Documentation is an essential part of any software project. It helps users understand how to use your software, provides context for development, and can be a valuable resource for future work. However, keeping documentation up to date can be a challenge, especially as projects grow and change. This is where automation can help. In this article, we'll explore how to automate documentation workflows with GitHub Actions.
What are GitHub Actions?
GitHub Actions is a feature from GitHub that allows you to automate workflows directly within your repository for continuous integration or continuous delivery. These actions are event-driven, and you can create custom workflows that trigger based on certain events, such as a push to your repository or the creation of a pull request. These workflows are defined using YAML files and can include a variety of actions that run commands, perform tasks, and interact with other services.
The Style Guides
Writing documentation is crucial, but keeping it clear and consistent can be challenging. This is where style guides step in. They're like rulebooks for your documentation, making it accurate and easy to understand.
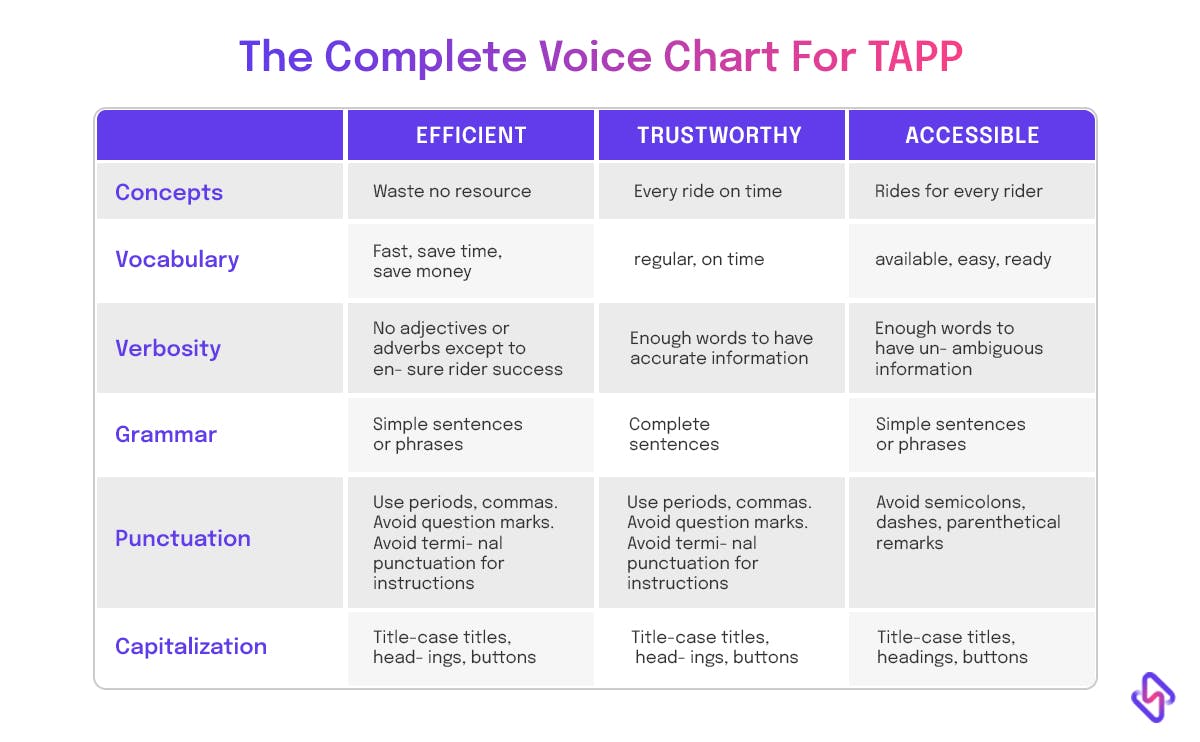
Style guides are your TAPP (Technical and Audience-focused, Persistent, and Productivity-boosting) companions. They play a vital role in ensuring your documentation meets high standards and resonates with your intended audience.
Technical Writing Style Guide
A technical writing style guide is your go-to resource for establishing a standardized approach to writing and formatting technical documentation. It provides guidelines on everything from grammar and punctuation to using specific terminology and formatting for code snippets. Here's why it's essential:
- Clarity: A well-defined style guide ensures your documentation is clear and easy to understand. It establishes rules for structuring sentences and paragraphs, which helps prevent ambiguity and confusion.
- Consistency: Consistency is key in technical documentation. The style guide ensures that all team members adhere to the same rules, leading to a unified and professional appearance for your documentation.
- Audience Focus: It helps tailor your documentation to the needs and understanding of your target audience. A good style guide considers who will read the documentation and adjusts the language and tone accordingly.
- Efficiency: A style guide streamlines the documentation creation process by providing a framework for writing. Team members spend less time debating how to phrase things and can focus on producing high-quality content.
Challenges with Style Guides
While style guides are immensely beneficial, they can sometimes be considered a necessary evil. Here are some common challenges developers and technical writers face when dealing with style guides:
- Resistance to Change: Team members might resist adapting to a new style guide, especially if they've been used to a different one. It can be challenging to implement change, and resistance can hinder its adoption.
- Maintenance: Style guides need periodic updates to remain relevant. The task of keeping them up-to-date can become burdensome, especially in fast-paced development environments.
- Overly Prescriptive: Some style guides can become overly prescriptive, stifling creativity and leading to documentation that feels robotic. Striking the right balance between rules and flexibility is essential.
- Too Lengthy: Overly comprehensive style guides can overwhelm team members with excessive detail. Keeping the guide concise and focused on what truly matters is important.
To address these challenges, it's crucial to use tools and automation, such as GitHub Actions, to enforce style guide rules consistently across your documentation. This makes adherence easier and keeps your documentation looking professional and cohesive.
Importance of Code Documentation
Documentation is an essential part of software development. It involves describing how your code works, what it does, and how to use it. While many developers may feel that documentation is an unnecessary extra step in the development process, there are several compelling reasons why you should care about code documentation.
Let’s go over a few reasons why code documentation is important.
- Proper documentation helps ensure that your code is maintainable. As your codebase grows and changes over time, it becomes increasingly difficult to remember how different parts of your code work. Documentation helps you and the team understand the purpose and functionality of your code, making it easier to update and maintain.
- Secondly, documentation can make it easier for others to contribute to your codebase. When new developers join your project, they need to be able to quickly understand how your code works and how to use it. Good documentation can provide this information, making it easier for new developers to get up to speed and start contributing.
- It can also help you catch errors and bugs in your code as development progresses. In writing good documentation, you are forced to think through the purpose and functionality of your code in a more systematic way, which can help you identify inconsistencies or issues in your code. Avoiding bugs and errors before they become bigger problems.
- Finally, good documentation can make your code more accessible to others. By providing clear, concise documentation, you make it easier for people with different backgrounds and levels of experience to understand and use your code. This can help you build a more diverse and inclusive development community, which can ultimately lead to better software.
How to Automate Code Documentation With GitHub Actions?
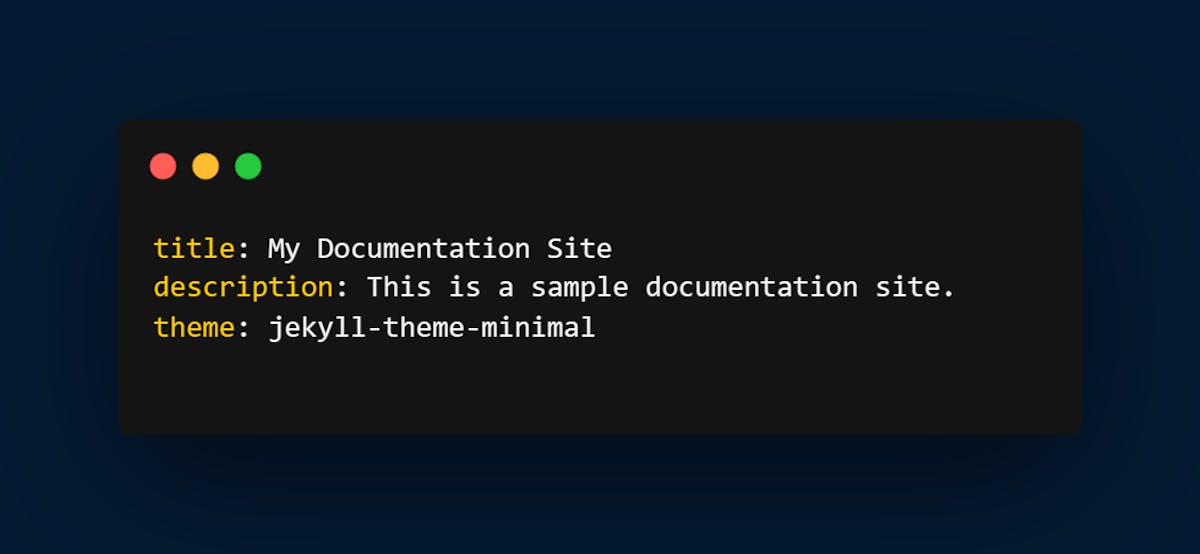
Before we proceed with the automation workflows, you need to decide if you want your docs to be hosted or not. You can choose to host your docs with static site generators like Jekyll, Hugo, and MkDocs. With Jekyll, create a configuration file that specifies your site's settings and options. This file is called _config.yml.
Here's an example configuration file:
In the sample above, there’s a title and description of our site, as well as specified a theme to use. You'll also need to create your pages using Markdown or HTML files. For Jekyll, these files are typically placed in a _pages directory.
1. Committing Your Documentation Files
Once you've set up your documentation site, you'll need to commit your files to your GitHub repository. This will allow your workflow to access and build your documentation site. Make sure that your files are organized in a way that makes sense for your site generator, and that any dependencies or plugins are included in your repository.
2. Creating a Workflow
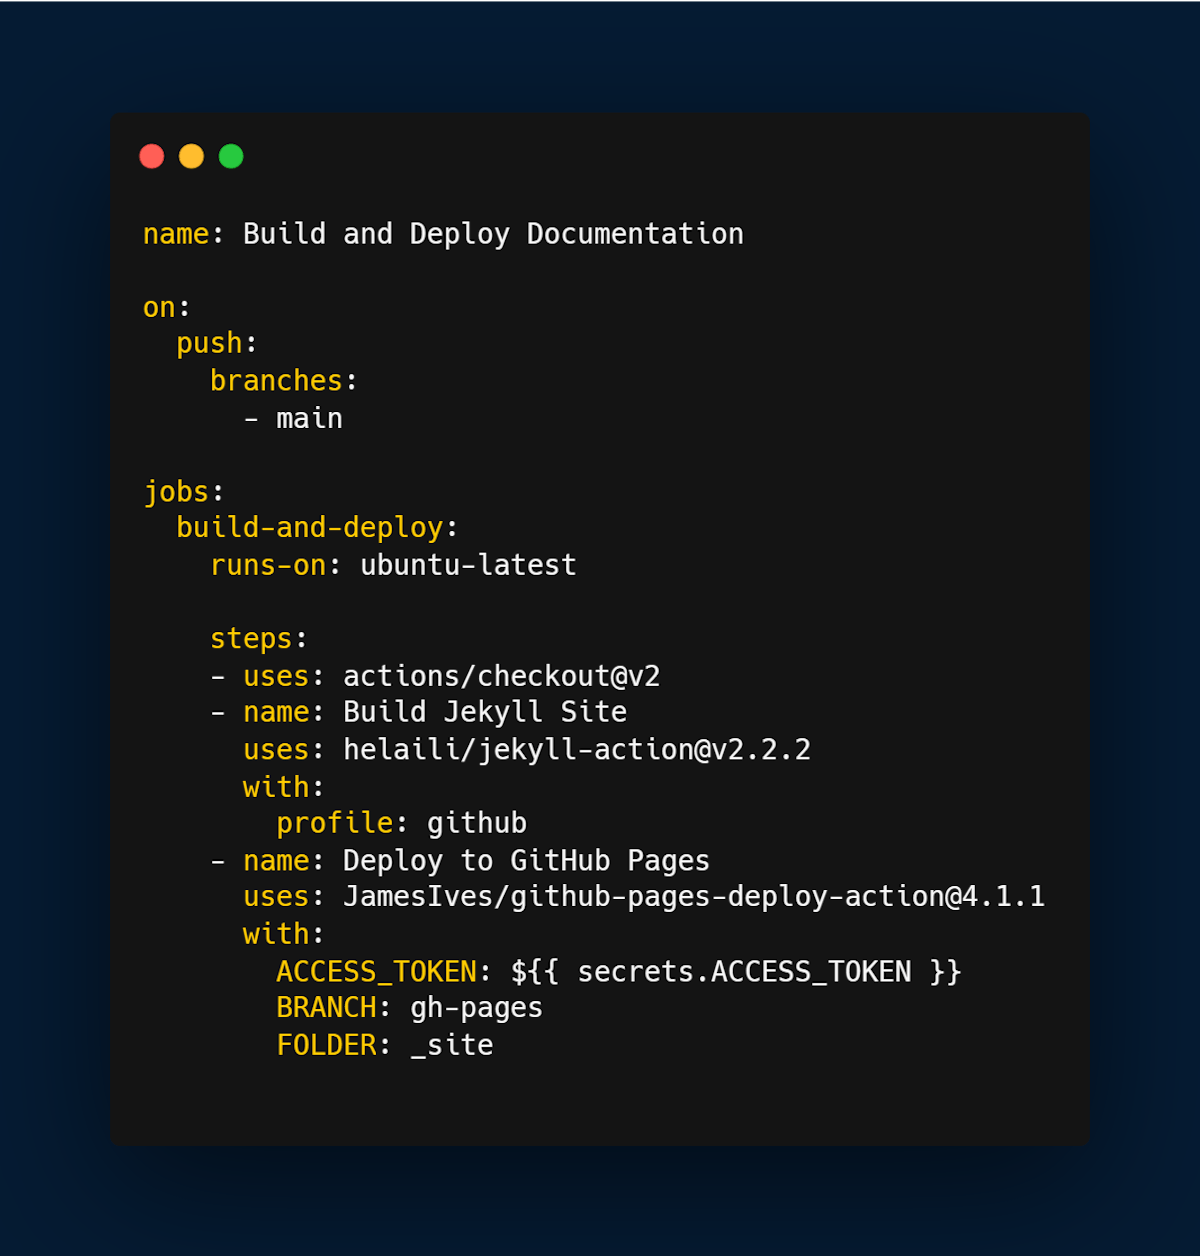
Now that your documentation site is set up and your files are committed, you're ready to create your GitHub Actions workflow. Workflows are defined using YAML files that are placed in a .github/workflows directory in your repository. Here's an example workflow file for Jekyll:
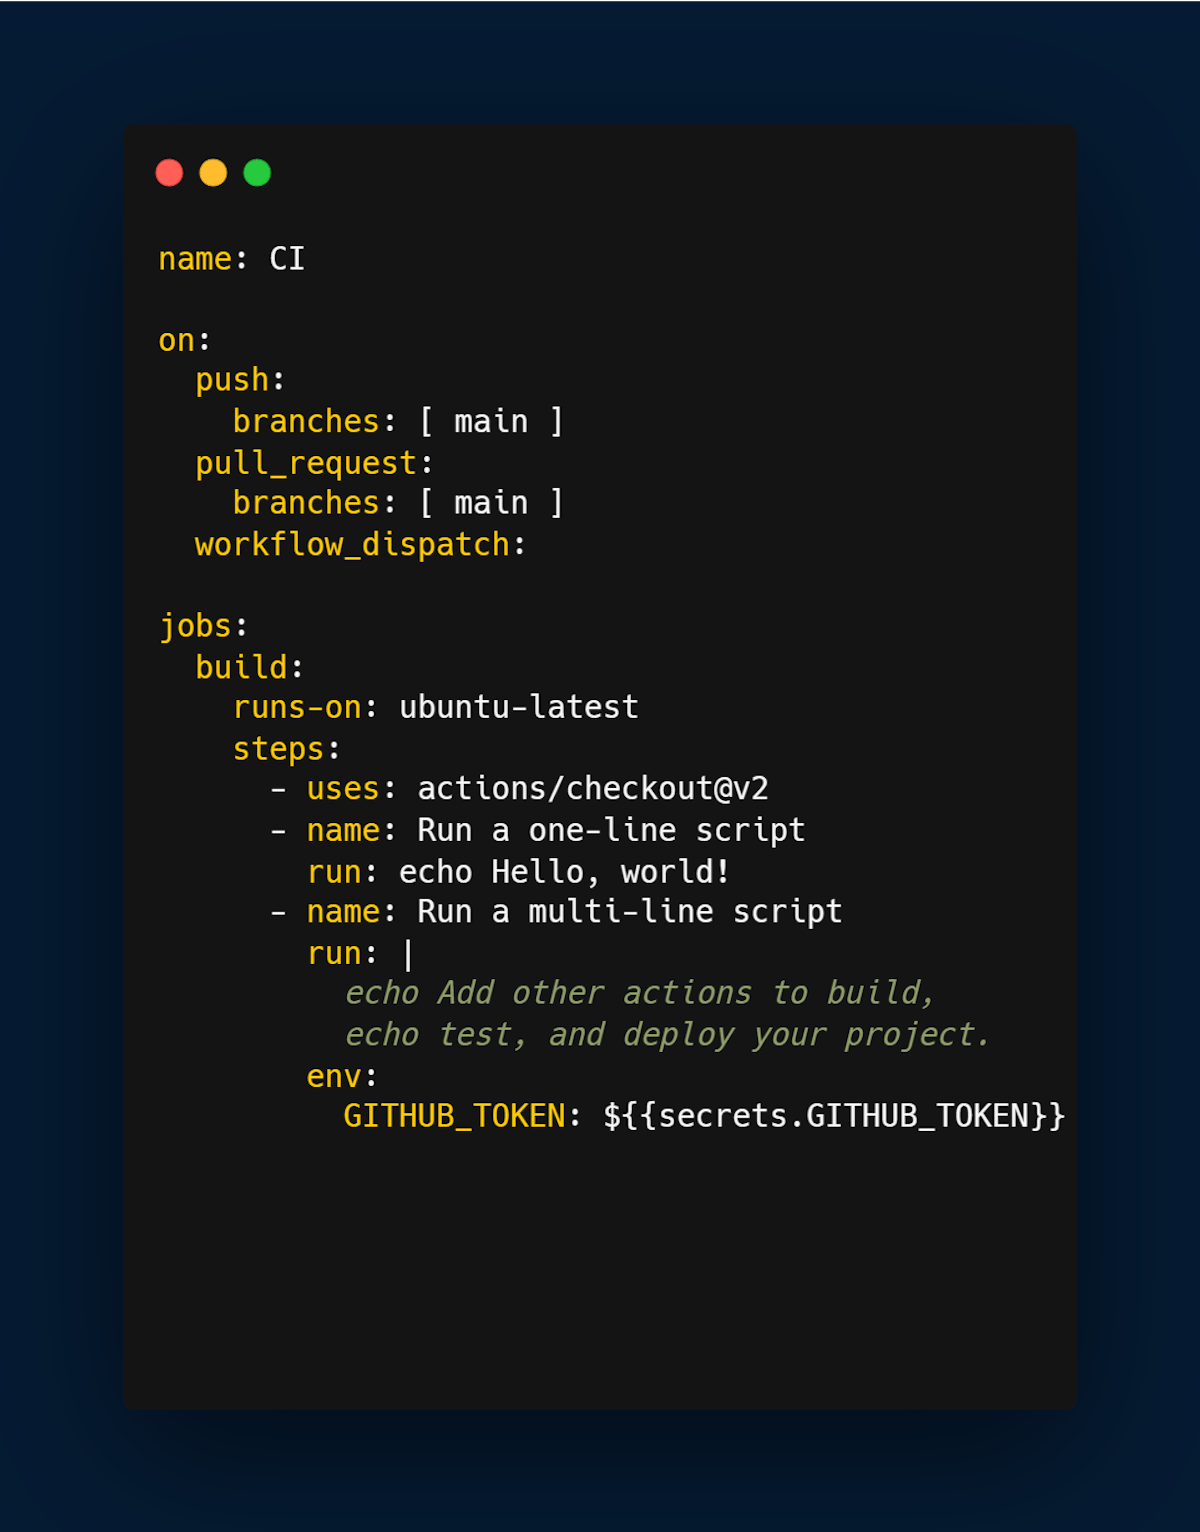
Let's break down this workflow file step by step:
- name: A descriptive name for your workflow.
- on: The events that trigger your workflow. In this case, we're triggering any push to the main branch.
- jobs: One or more jobs that define the steps to be taken.
- build-and-deploy: The name of our job.
- runs-on: The environment in which our job runs. In this case, we're using the latest version of Ubuntu.
- steps: The individual steps to be taken
3. Using Linters
When it comes to writing documentation, it's easy to focus on the content itself and forget about the importance of formatting and consistency. However, consistent formatting and style are critical for readability, maintainability, and collaboration. This is where linters come in.
Linters are tools that automatically check your code for common errors and formatting inconsistencies. They can help you catch mistakes and ensure that your code is consistent and readable. In the context of code documentation, linters can be used to enforce consistent formatting and style across your documentation, making it easier to read and understand.
For this article, we’ll be using Vale linter, Vale Linter is a popular linter tool for checking and improving the quality of written content, including code documentation. Vale uses customizable rules to check written content against specific style and grammar guidelines, making it easier to maintain consistent and high-quality documentation.
Vale can be used with various markup languages, including Markdown, reStructuredText, AsciiDoc, and more. It can also integrate with popular text editors and development environments, such as VS Code and Sublime Text, allowing you to catch errors and style inconsistencies in real time as you write. Vale offers support for custom styles and style guides. You can create your custom style guide, or use one of the many pre-made style guides available in the Vale Style Repository. This allows you to enforce specific style and grammar rules that are tailored to your organization or project.
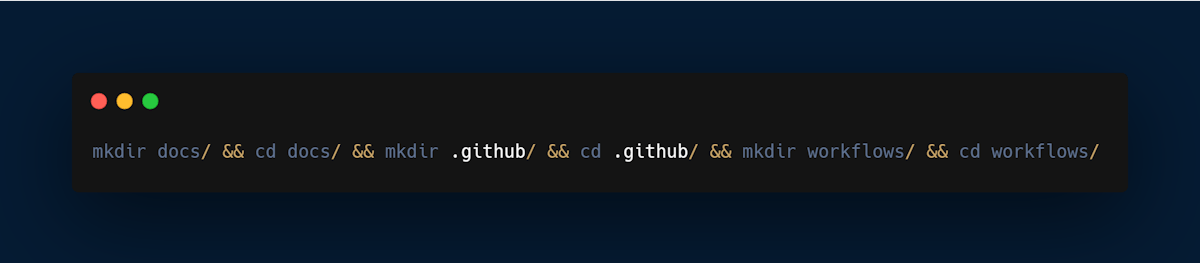
- Create a directory locally on your computer:
name: Is a string that is given to the workflow being setup
Jobs: actionable events that are to be executed. An environment is also selected where the actions are to run. In this case, we used Ubuntu.
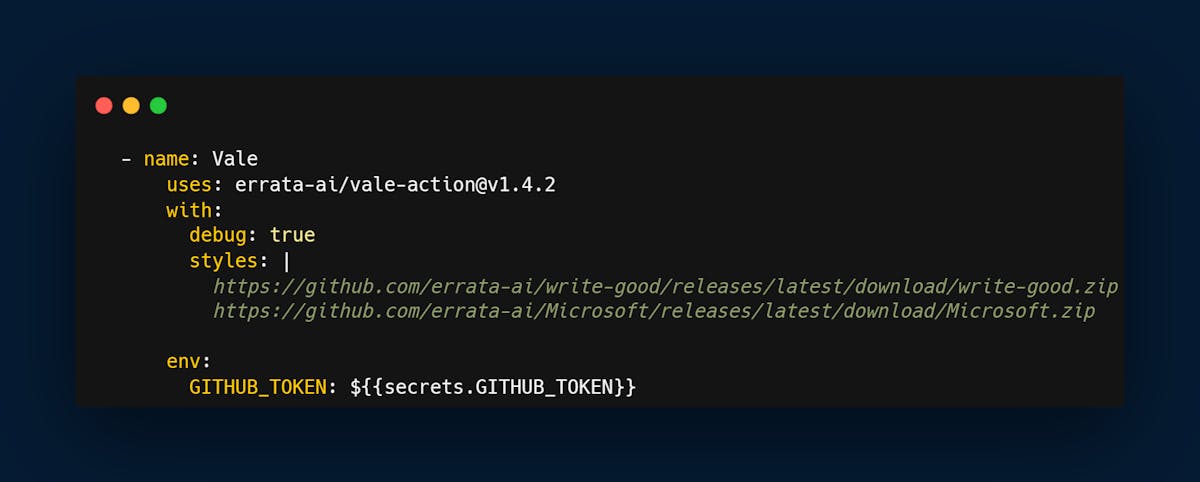
4. Setting Up Vale on our GitHub Action
It’s time to set up our vale workflow on the GitHub action we have created.
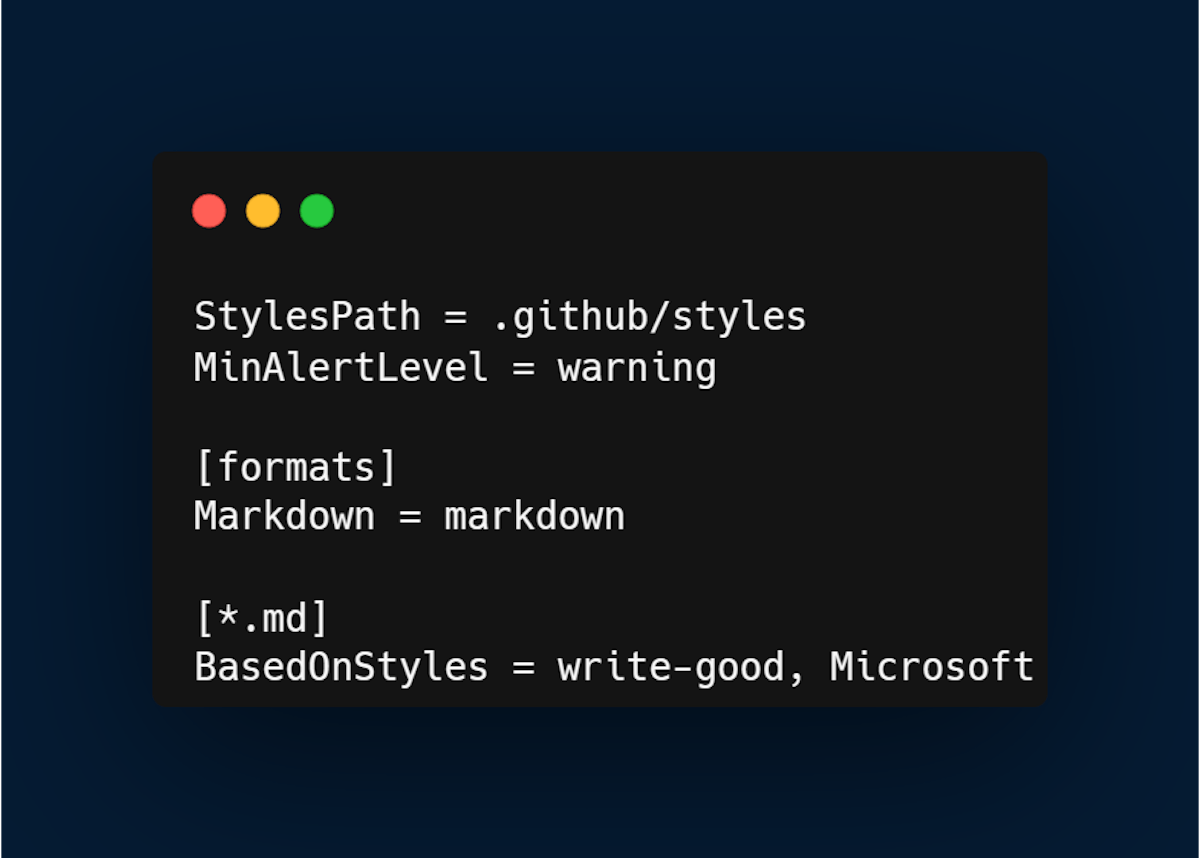
Copy the following into your GitHub action.
Here’s a list of recommended style guides to use, but in our case, we made use of the write-good style guide.
- Every commit on your markdown document triggers the vale action on GitHub.
Moreover, you can also check out our article on Tips to Automate GitHub Release Creation.
Advancing Documentation Quality with GitHub Actions
In conclusion, code documentation is an essential part of software development that can help ensure maintainability, improve collaboration, catch errors and bugs, and make your code more accessible to others. While it may take some extra time and effort to write good documentation, the benefits are well worth it in the long run.
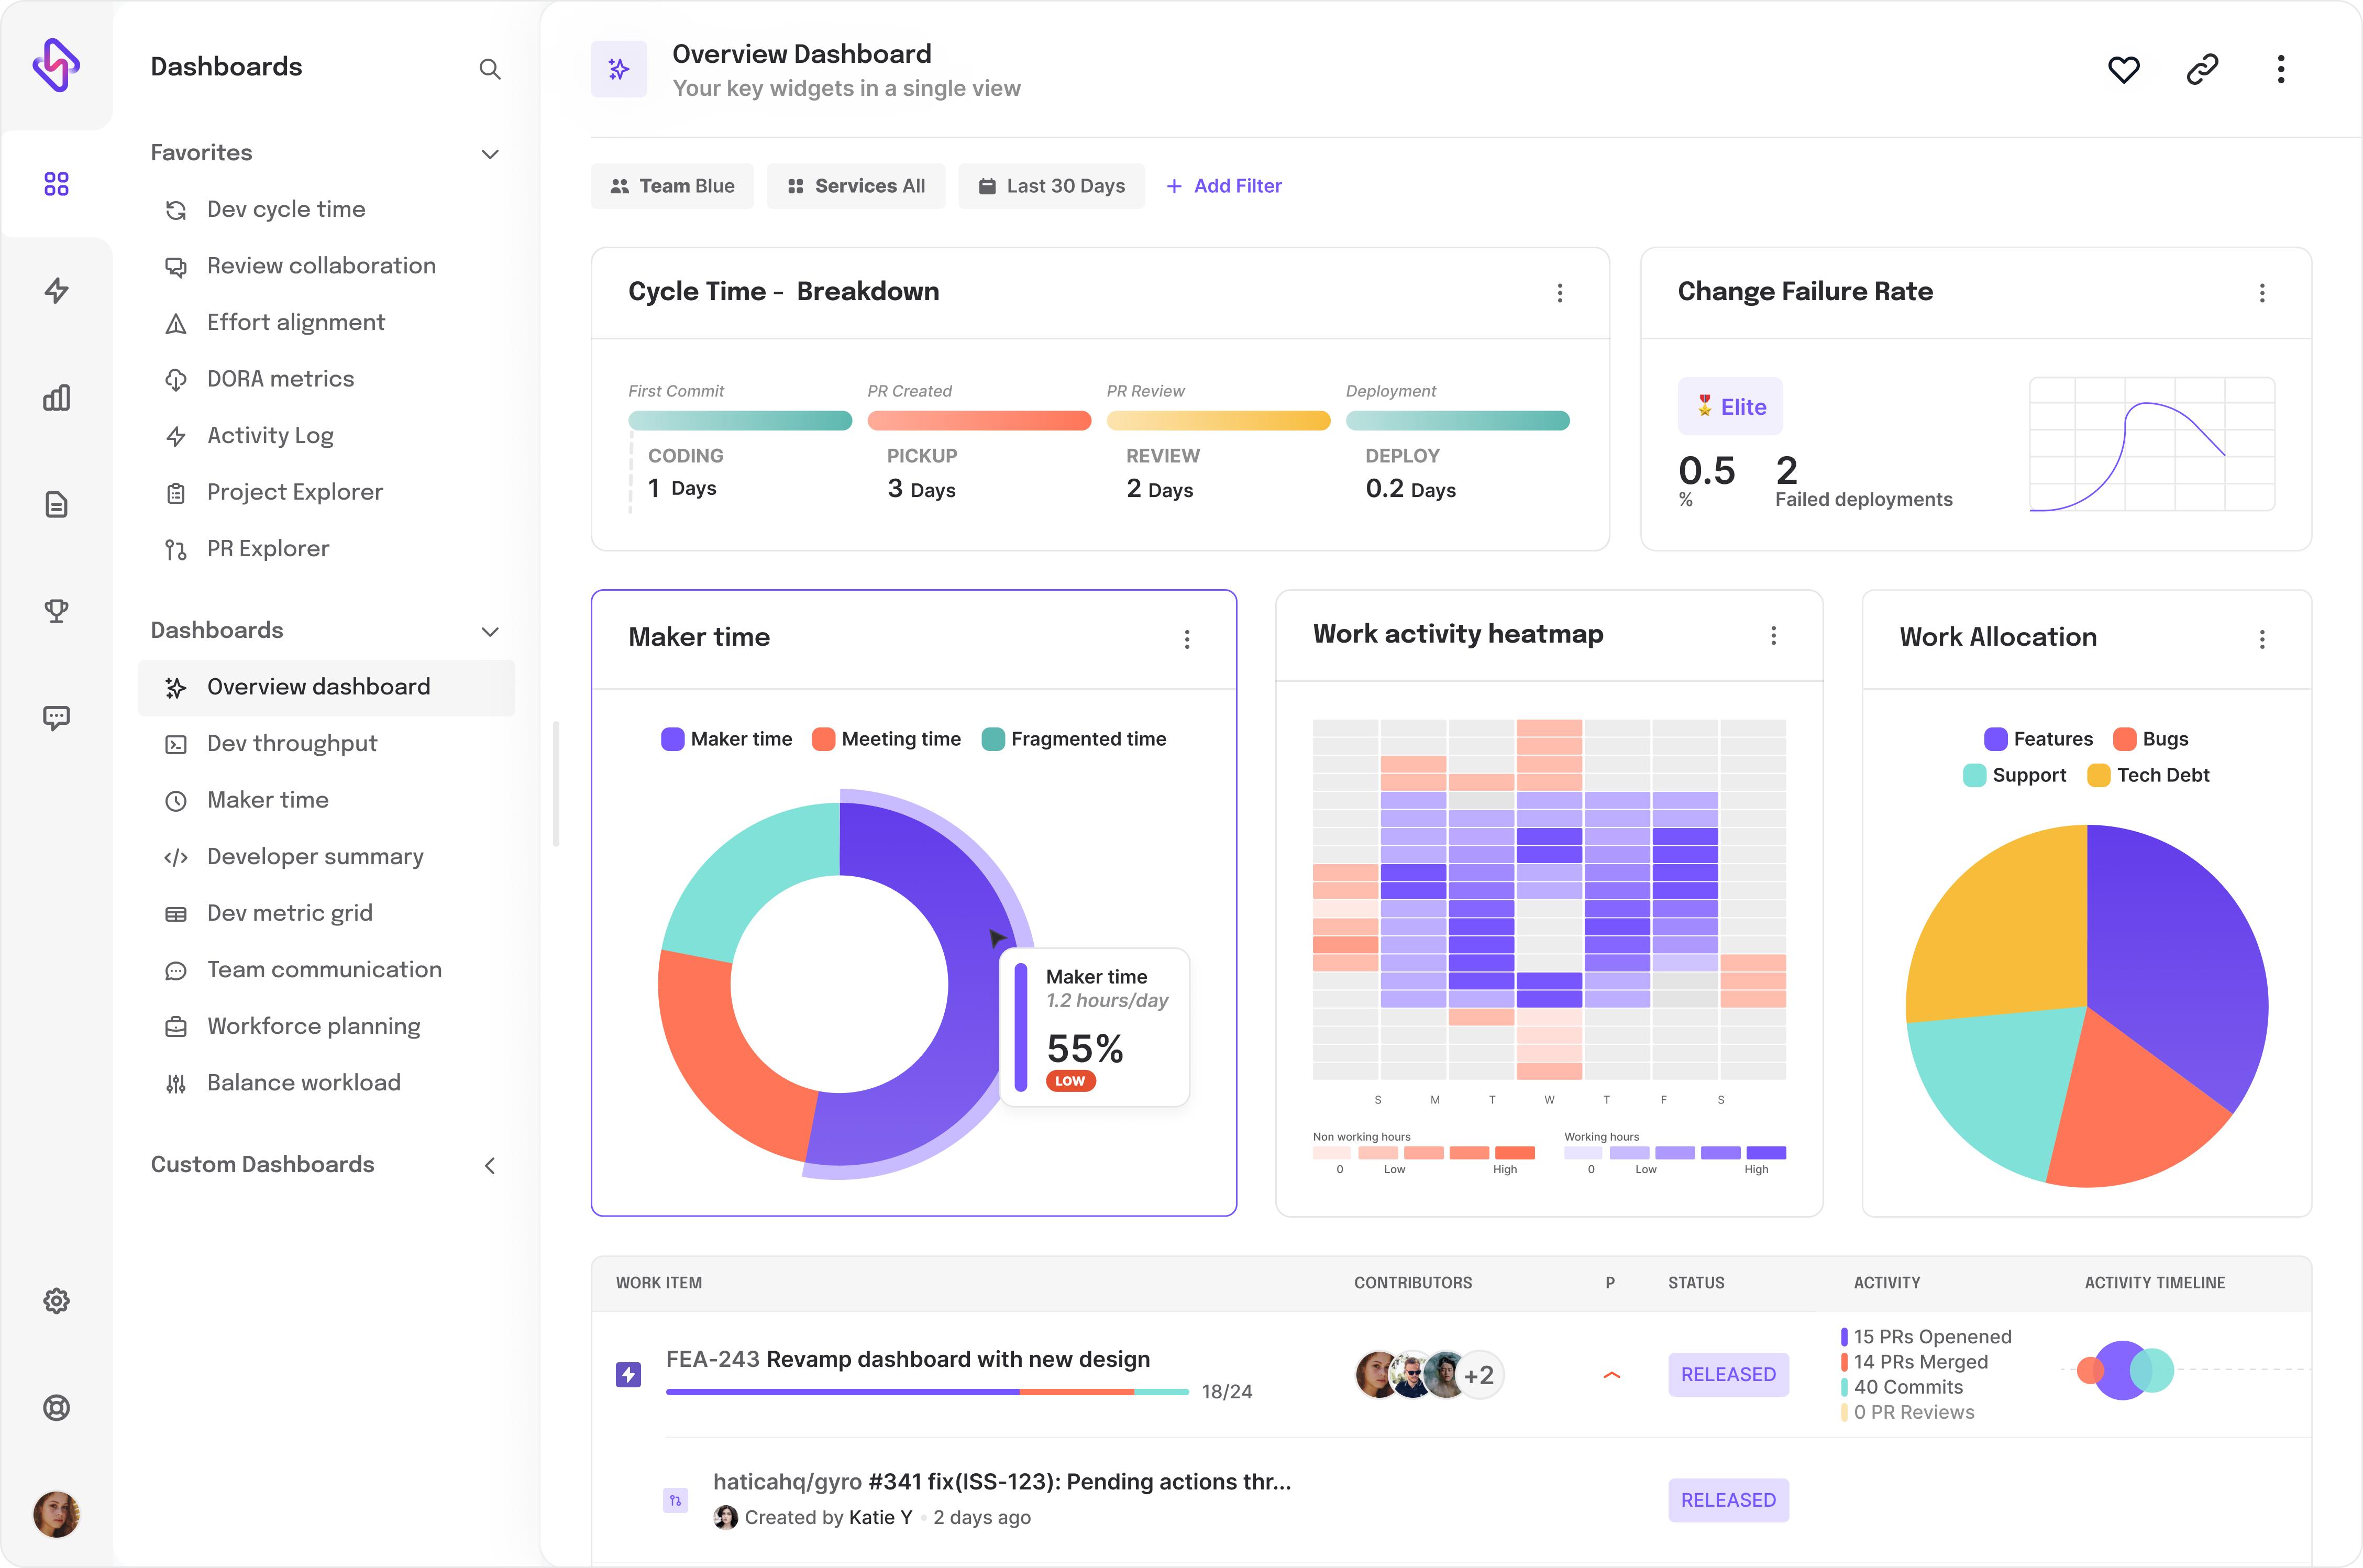
However, simply switching using GitHub Actions sometimes might not be enough to get the best out of your project space, an engineering analytics tool can equip you with the data-driven insights you need to place your team on top. Hatica offers metrics across 13 dashboards, powered by CI/CD tools, Jira, GitHub, and GitLab. By collating tool activities at one place, Hatica helps teams streamline their workflow and improve productivity.
Subscribe to the Hatica blog today to read more about unblocking developers, and boosting productivity with engineering analytics.
FAQs
1. What can I automate with GitHub Actions?
Using GitHub Actions, you can automate your build, test every pull request to your github repository and deploy merged pull requests to production.
2. What is the use of GitHub Actions documentation?
The best use of GitHub Actions documentation is to automate, customize, and execute the software development in your repository.