- Tasks: Tasks are individual items that need to be done. You can assign tasks to team members, set due dates, add descriptions, and track their progress. Tasks are the core units of work within ClickUp.
How to Use ClickUp for Efficient Project Management?
ClickUp is user-friendly and allows managers to track team progress on tasks, deadlines, budgets, and resources. Now, let us see the step-by-step process of using ClickUp for project management.
Step 1: Sign Up and Workspace Creation
When you're ready to start using ClickUp for your project management needs, you'll first need to sign up for an account. Visit ClickUp's website and follow the straightforward registration process. Once you've registered, you'll be prompted to create a workspace.
What's a Workspace? Think of a workspace as the virtual home for all your projects and tasks. It's where everything happens in ClickUp. Give your workspace a meaningful name, perhaps something related to your company name or the primary team using ClickUp.
Step 2: Project Setup
It's time to create your first project. A project in ClickUp is like a container for your tasks. It helps you group related work together, making it easier to manage, and you can also customize.
- Customize Your Project: When setting up a project, take a moment to add details like the project name and a brief description. This information provides context to your team members about what the project is all about.
Step 3: Task Management
Tasks are at the core of your project management efforts in ClickUp. They represent the specific work items or actions that must be completed to reach your project's goals. Let's check a few tasks in detail.
- Adding Tasks: To add a task, click within your project and name it. You can also set deadlines for tasks, which helps manage deadlines. Assign tasks to team members by specifying who is responsible for completing each task.
- Task Descriptions: Make sure to provide clear task descriptions. It helps your team members understand what needs to be done and any specific requirements.
Step 4: Collaboration & Communication
Effective communication is key to successful project management. ClickUp offers a built-in way to collaborate right within your tasks.
Here is the communication that is used in ClickUp
- Task Comments: You can leave comments on tasks to discuss details, provide updates, or ask questions. It's like having a conversation specific to each task, keeping everything organized.
- @Mentions: If you need to notify a team member about a task or comment, use @mentions. Type "@" followed by their name, and they'll receive a notification.
Step 5: Create Automation
ClickUp is a transformative tool in project management, allowing for the automation of repetitive tasks & streamlining workflows. Dive into automation rules
Setting Up Automation Rules:
- Navigate to the Automation area in ClickUp.
- Create automation rules based on your specific needs. For instance, you can automate task assignments, due date reminders, or status changes.
- These rules help save time and ensure that routine tasks are handled automatically.
Step 6: Customize the Visuals
Customizing the visuals in ClickUp can enhance the user experience and align the platform with your team's branding or preferences.
Choosing Colors and Labels:
- ClickUp provides options to select colors and labels for different tasks, statuses, and elements.
- Use these customization options to make your workspace visually appealing and easy to navigate.
Customize Task Views:
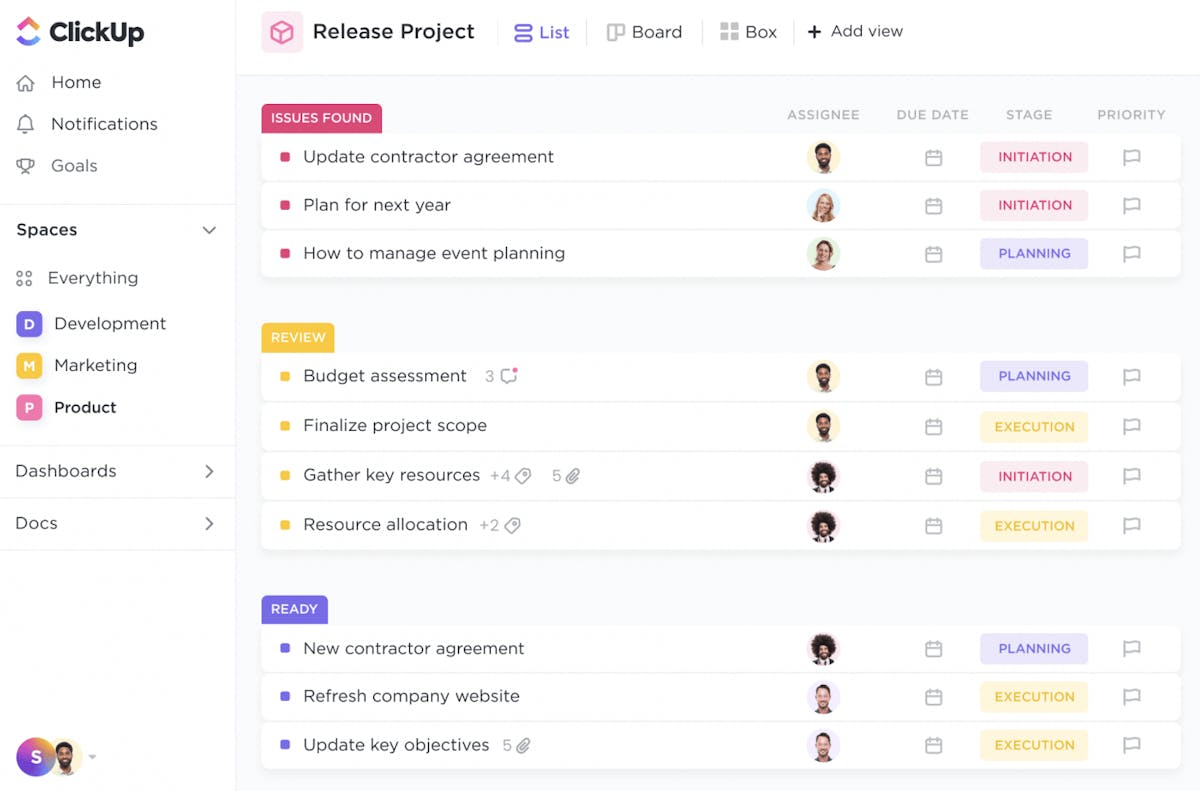
- ClickUp offers task views such as List, Board, and Calendar views.
- Customize task views to suit your project's needs. For example, use the Board view for a visual Kanban-style workflow or the Calendar view to schedule tasks over time.
Personalize Your Space:
- Personalize your workspace by adding your team's logo or other branding elements.
- A visually customized workspace can make ClickUp more inviting and user-friendly for your team.
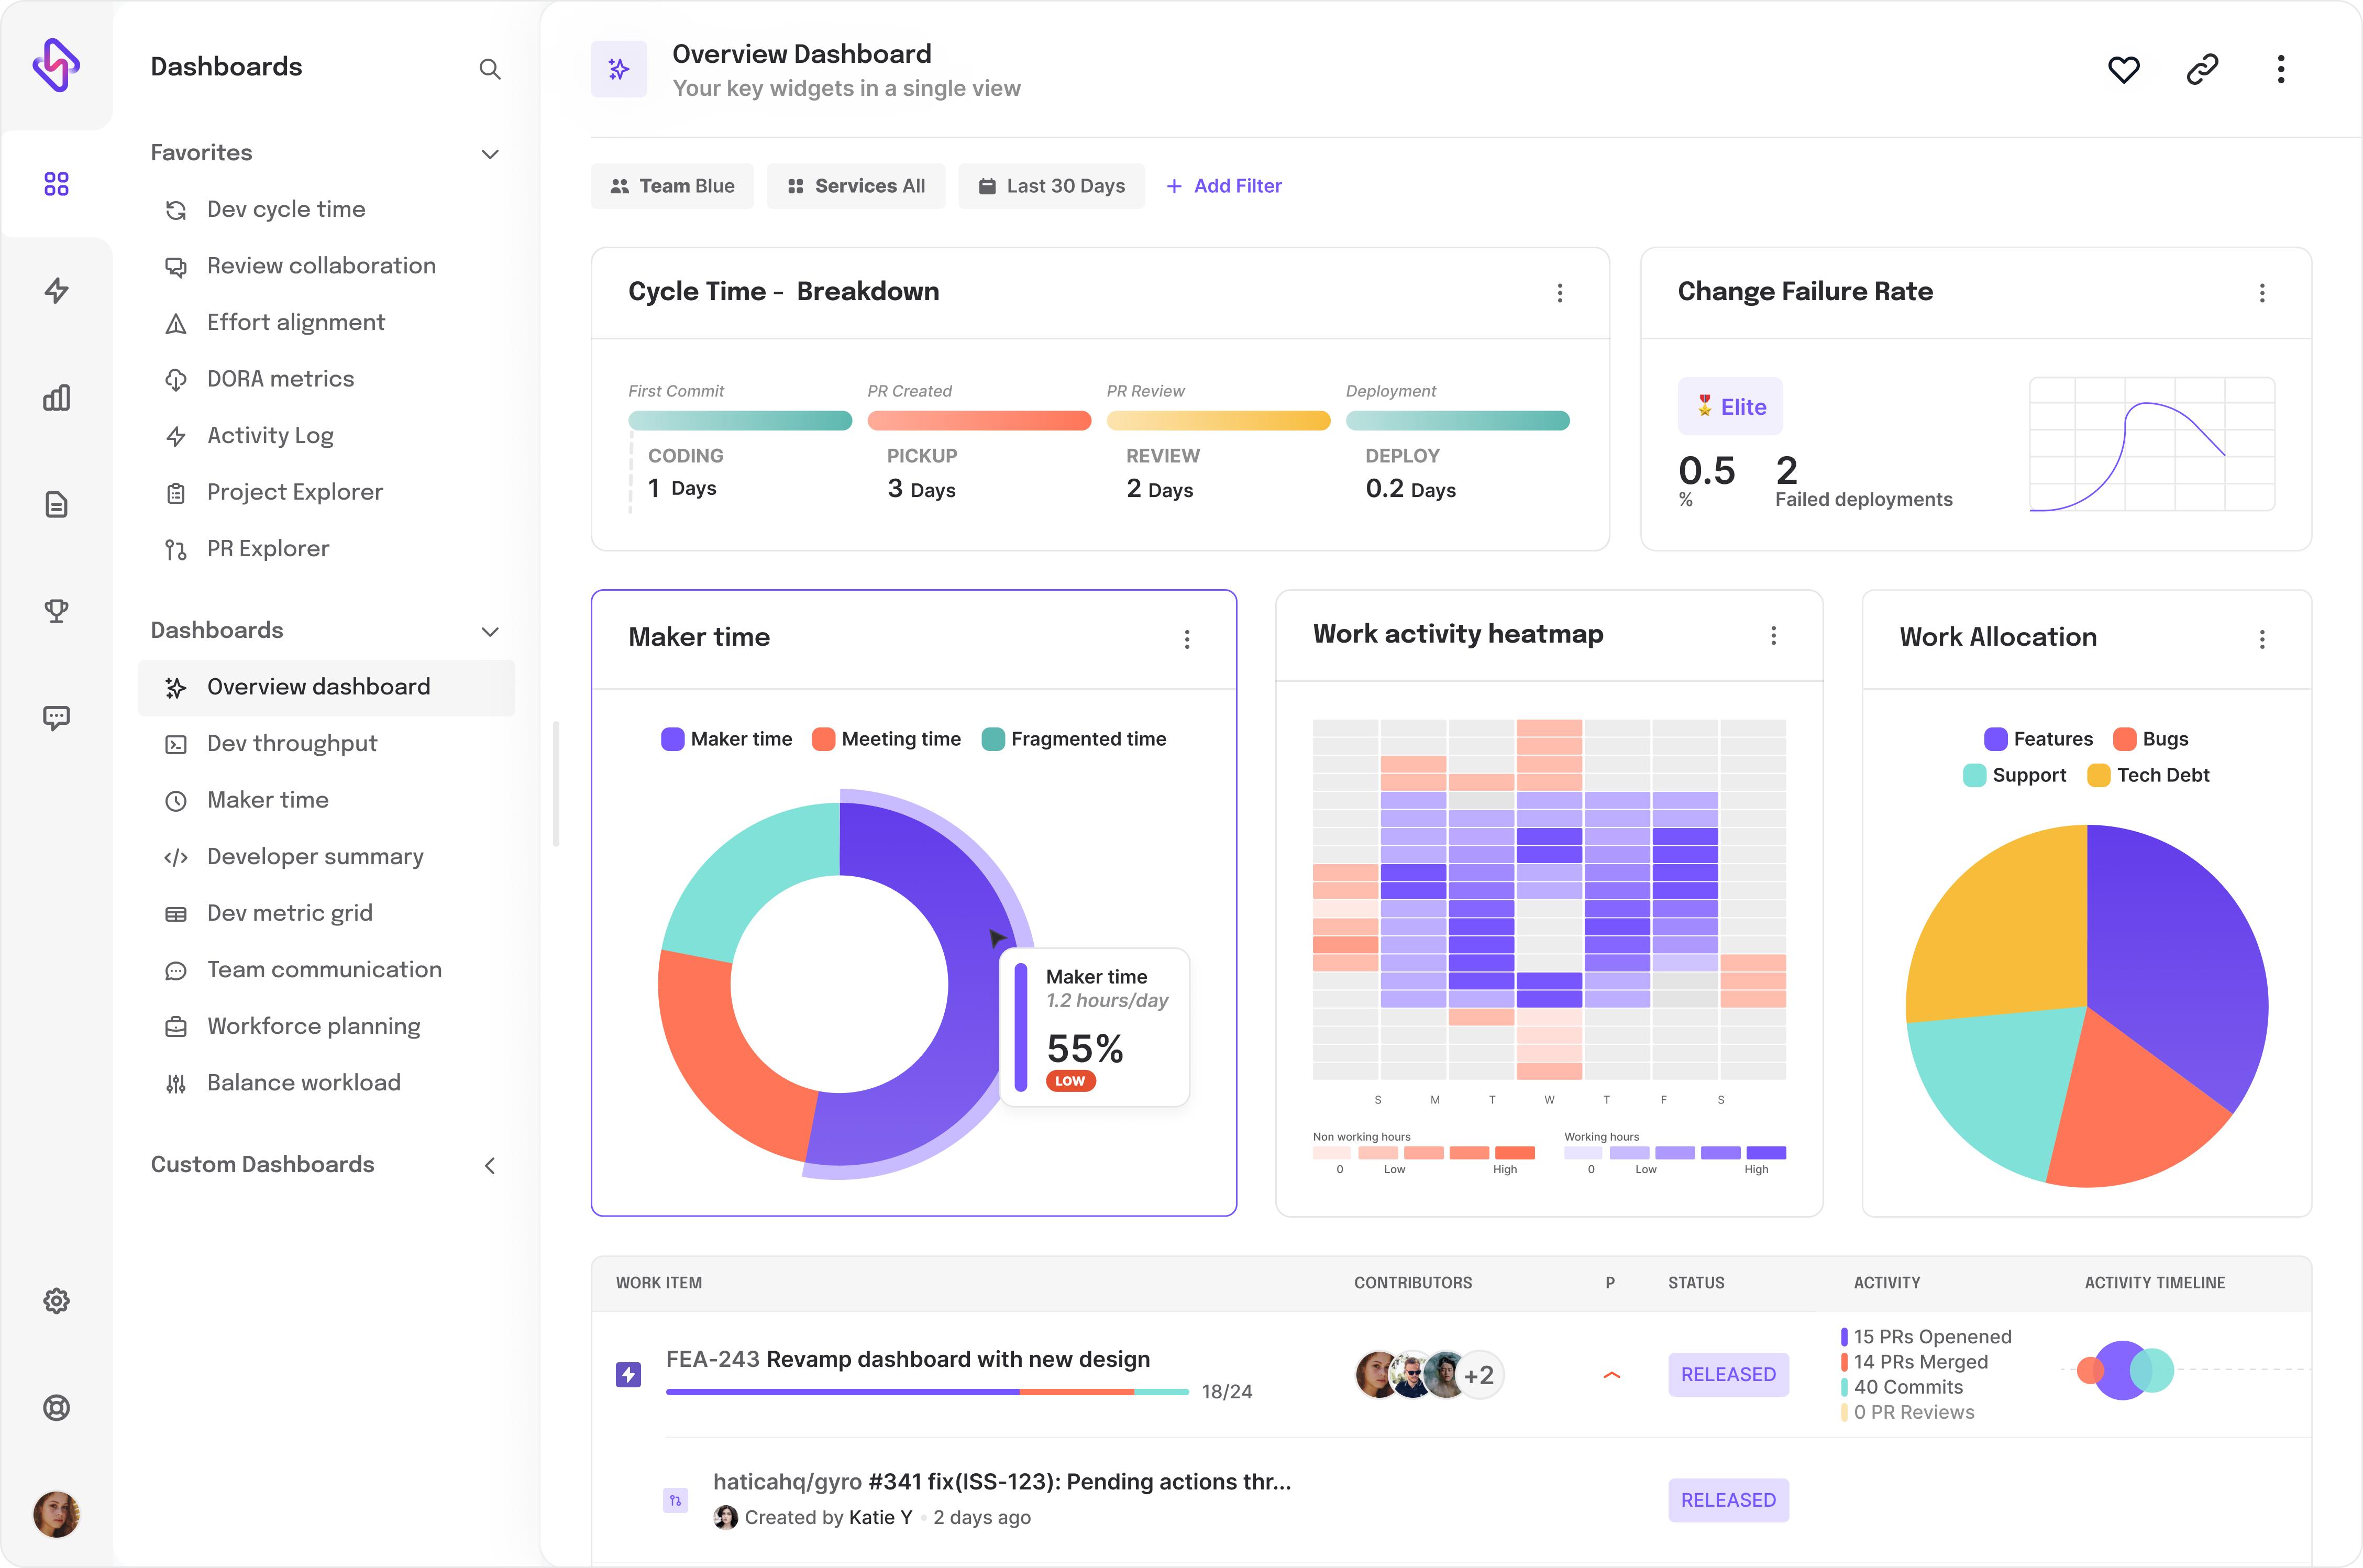
Step 7: Tracking Progress
Monitoring progress is crucial once tasks are assigned, and work is underway. It provides tools for tracking time and task completion.
Why Should Software Development Teams Use ClickUp?
ClickUp is an effective and efficient tool for project management. Here are the comprehensive features that make it a valuable addition:
In project management, it is necessary to prioritize information so all necessary data stays on top of all lists. The exercise also has its utility in resolving communication hurdles. ClickUp offers a plethora of editing and formatting features- like adding emojis or images, among others. The document sharing and commenting options differentiate ClickUp from Jira and Asana.
With ClickUp it's easy to share files through a simple drag-and-drop operation. This ability to track document transactions provides clarity to track progress across departments. Users can also comment on the shared documents, thus enabling better collaboration and seamless communication. The recipients are notified as and when tagged in the comments and continue to get reminders until the issue is resolved.
3. Multiple Views
ClickUp has the option to visualize information in various views - something that was unavailable in conventional project management tools. The three different views - List, Board, and Capacity, come with their own advantages and appeals to various roles and preferences.
4. A User-Friendly UI