
Git is a popular version control system that assists developers in effectively managing their code. It enables developers to track changes to their code, collaborate with their team, and keep a history of their work. Git tags are a powerful feature of Git that allows developers to mark specific points in Git history as significant events. This helps in version control and makes it easier to track and maintain project releases.
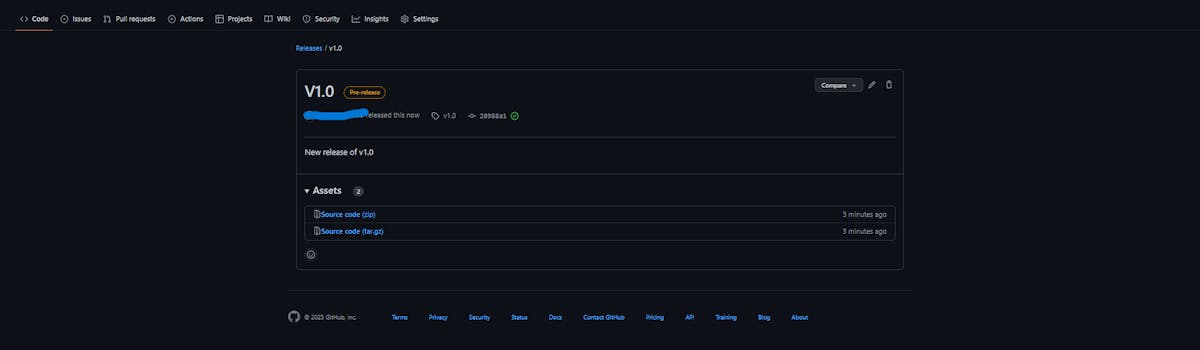
A Git release is a GitHub object that allows you to display official program versions on your project page. The object displays a specific commit point, a Git tag, and the release status. Managing releases on the GitHub website is a simple and straightforward process.
What are Git Tags?
A Git tag is a lightweight, permanent label that is attached to a specific point in Git history. Git tags are commonly used to mark release points in a project, such as v1.0 or v2.0. Tagged Git releases can be easily distributed, making it easier for users to download and manage the code.
Types of Git Tags
There are two types of Git tags: lightweight and annotated.
1. Lightweight Tags
They are simple pointers to a specific commit in Git history. They are the equivalent of a branch that points to a specific commit but never changes. Lightweight tags are easy to create and manage but lack the additional metadata that annotated tags provide.
2. Annotated Tags
These types of tags, on the other hand, are stored as full objects in the Git database. They contain a pointer to a specific commit, along with additional metadata such as the tagger name, email, date, message, and signature. Annotated tags are more robust and secure than lightweight tags, making them a good choice for marking releases.
Why Use Git Tags for Release Management?
Git tags are an essential tool for release management. They allow developers to easily track and manage releases, making it easier to identify and revert to previous versions if necessary. With Git tags, developers can quickly and easily manage the release process, ensuring that each release is properly documented and labeled for future reference.
How to Create a Git Tag?
To create a Git tag, you first need to checkout the commit that you want to tag. Then, you can run the following command in your terminal:
$ git tag <tag_name>
To create an annotated tag, you can use the -a flag, followed by the tag name and a message:
$ git tag -a <tag_name> -m <message>
Once you have created your Git tag, you can push it to a remote repository for sharing and distribution. You can use the following command to push your tags to a remote repository:
$ git push origin <tag_name>
Manage Git Releases from Tags on GitHub
Here are the steps to manage Git releases from tags on GitHub:
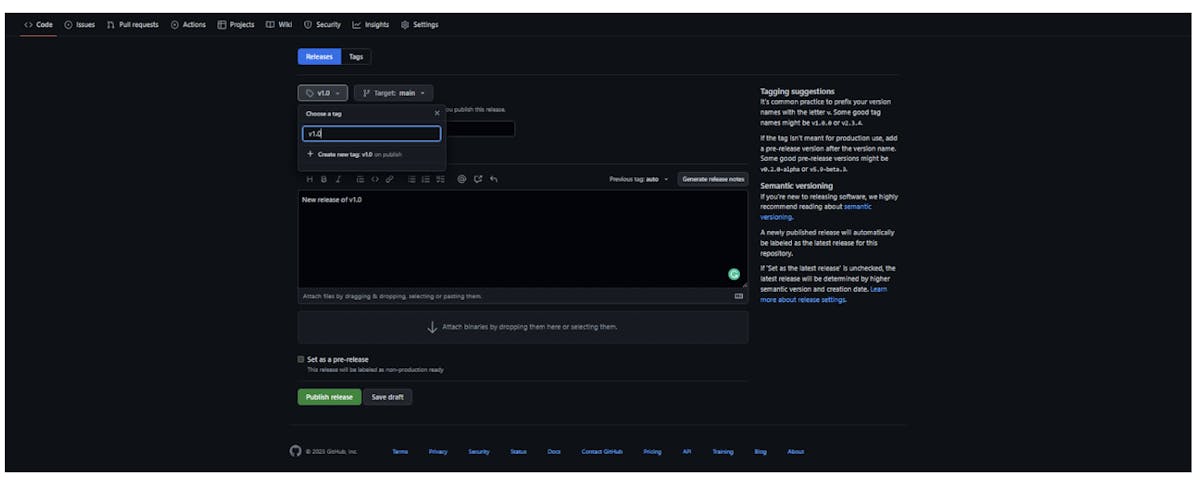
Access the Releases Page
To start, navigate to the Releases page by clicking "Draft New Release" on your GitHub repository. You can also access the page quickly using the following URL format: https://github.com/<username>/<repository>/releases
Choose a Git Tag
Next, click on "Choose a tag" to open a dropdown menu and select the desired Git tag for your release. If you haven't created a tag yet, you can type the name of a new tag and hit "Enter."