Jenkins is an open-source automation tool that can be used for continuous integration (CI) and continuous delivery (CD) of software. It allows you to automate the build, test, and deployment process of your software and is widely used in DevOps. In this article, we will discuss how to set up a Jenkins Pipeline on AWS.
[Read more: Integrating GitHub Webhooks to a Jenkins Pipeline]
Prerequisites of Setting up Jenkins- AWS Integration
Before you begin setting up Jenkins on AWS, you will need the following:
- An AWS account
- A running EC2 instance on AWS
- A domain name for your Jenkins server
How to Setup Jenkins Pipeline on Aws?
Here is a step-by-step guide to follow for setting up the Jenkins-AWS integration:
Step 1: Install Jenkins on your EC2 instance
To install Jenkins on your EC2 instance, follow these steps:
- Launch an EC2 instance running an Amazon Linux 2 AMI.
- Log in to the instance using SSH.
- Install Java by running the following command:
- Import the Jenkins GPG key by running the following command:
- Add the Jenkins repository to your Yum repository list by running the following command:
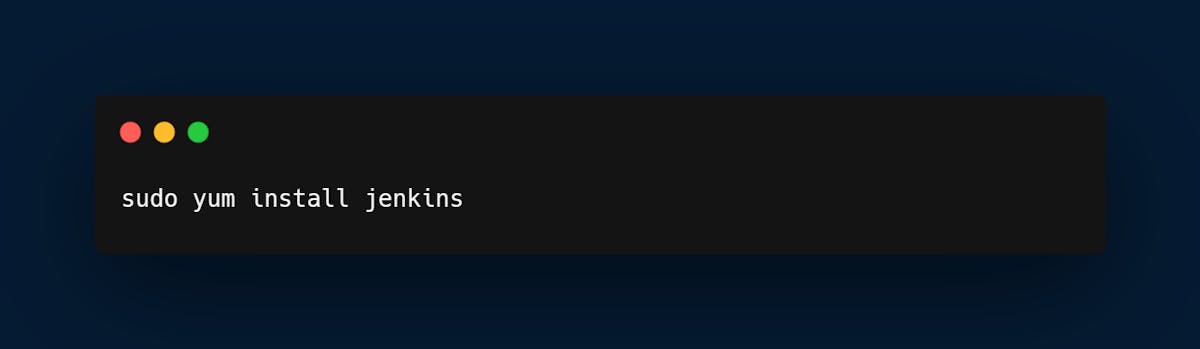
- Install Jenkins by running the following command:
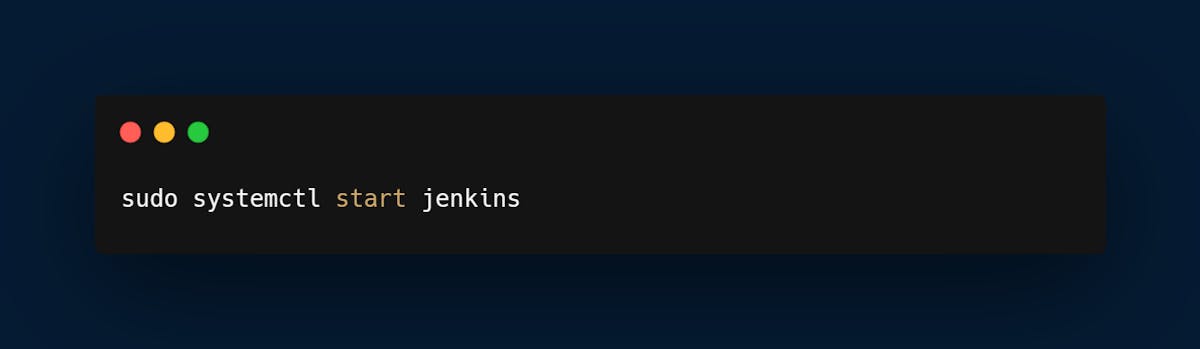
7. Start the Jenkins service by running the following command:
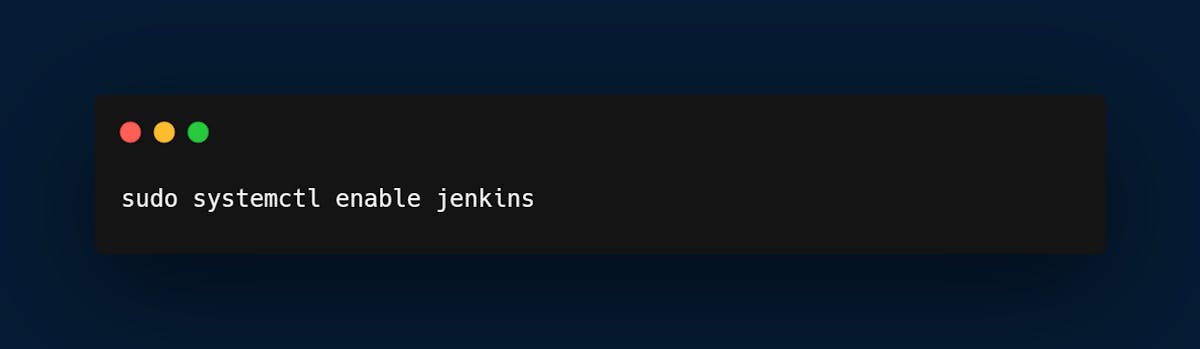
8. Enable Jenkins to start on boot by running the following command:
Once Jenkins is installed, you need to configure it to work with AWS. Follow these steps to configure Jenkins:
- Open a web browser and navigate to http://<your-server-domain>:8080. You should see the Jenkins login page.
- Enter the default administrator password. You can find this password in the file /var/lib/jenkins/secrets/initialAdminPassword on your EC2 instance.
- Install the suggested plugins or select the plugins that you need.
- Create an admin user and configure the Jenkins URL.
- Click the "Save and Finish" button and then the "Start using Jenkins" button.
Step 3: Set up Jenkins Pipeline
Once Jenkins is configured, you can create a Pipeline to automate the build, test, and deployment process of your software. Follow these steps to create a Pipeline:
- Click the "New Item" button in the Jenkins dashboard.
- Enter a name for your Pipeline and select "Pipeline" as the type of project.
- Click the "OK" button.
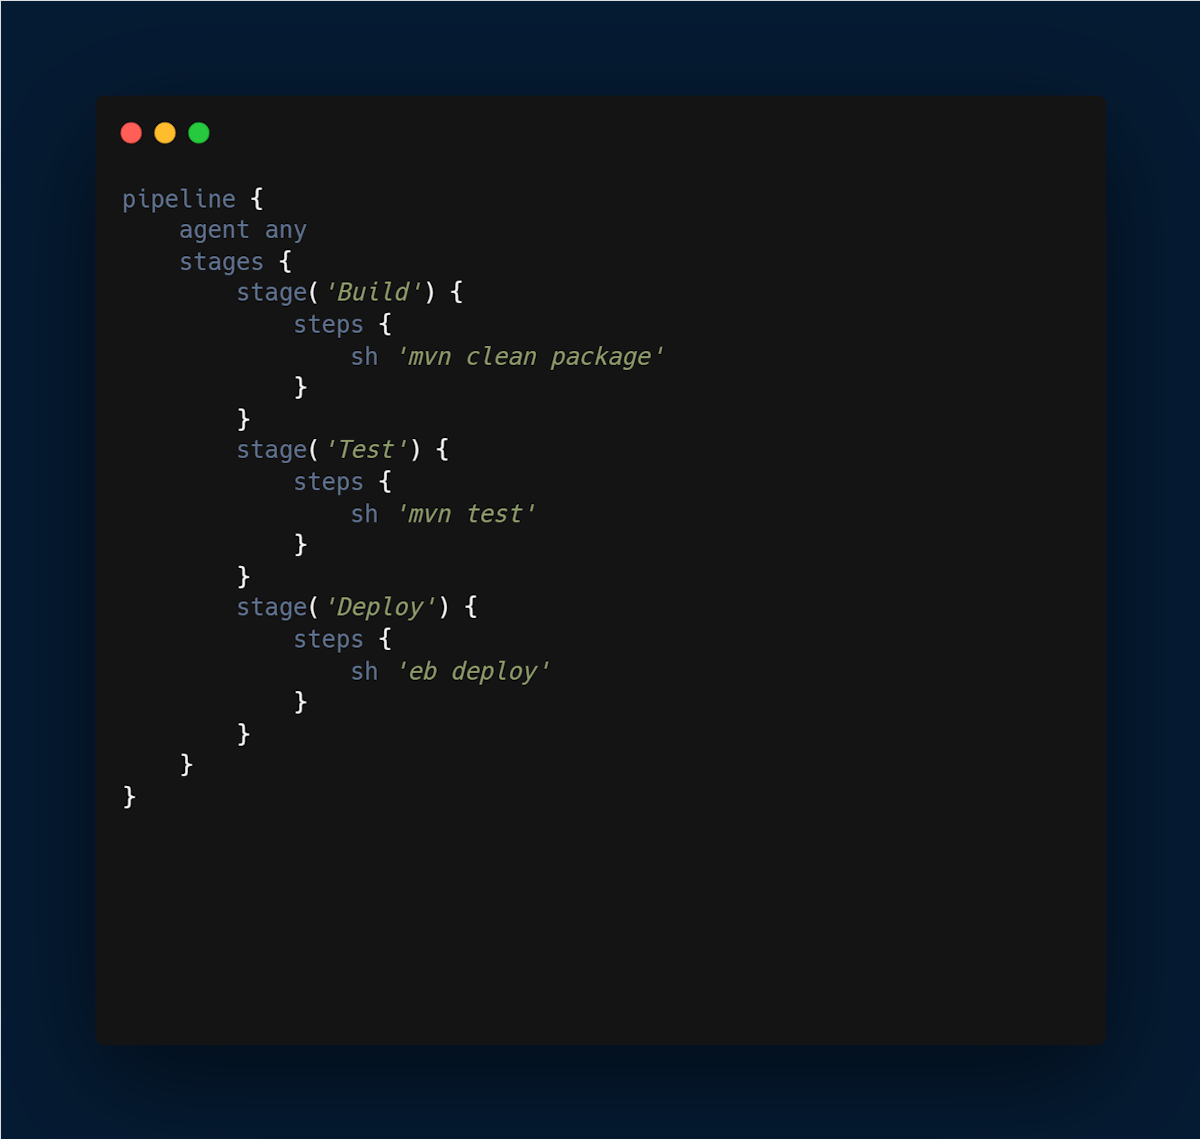
In the Pipeline script section, enter the script that defines your Pipeline. Here's an example script:
This script defines a Pipeline with three stages: Build, Test, and Deploy. In the Build stage, the script runs the Maven clean package command to build the project. In the Test stage, the script runs the Maven test command to run the unit tests. In the Deploy stage, the script runs the eb deploy command to deploy the application to AWS Elastic Beanstalk.
- Click the "Save" button to save your Pipeline.
Step 4: Set up AWS credentials
To deploy your application to AWS Elastic Beanstalk in the Deploy stage of your Jenkins Pipeline, you need to set up AWS credentials in Jenkins. Here's how to do it:
- Log in to your AWS console and go to the IAM service.
- Create a new IAM user or use an existing user.
- Attach the "AmazonEC2FullAccess" and "AWSElasticBeanstalkFullAccess" policies to the user.
- Generate an access key and a secret key for the user.
- In the Jenkins dashboard, click on "Credentials" on the left-hand menu.
- Click on "Global credentials (unrestricted)" and then click "Add Credentials".
- Choose "AWS Credentials" from the list of credential types.
- Enter a description for your credentials and enter the access key and secret key for your IAM user. Click "Save".
Step 5: Modify your Pipeline script to use AWS credentials
Now that you have set up AWS credentials in Jenkins, you need to modify your Pipeline script to use them. Here's how to do it:
- Open your Pipeline script in Jenkins.
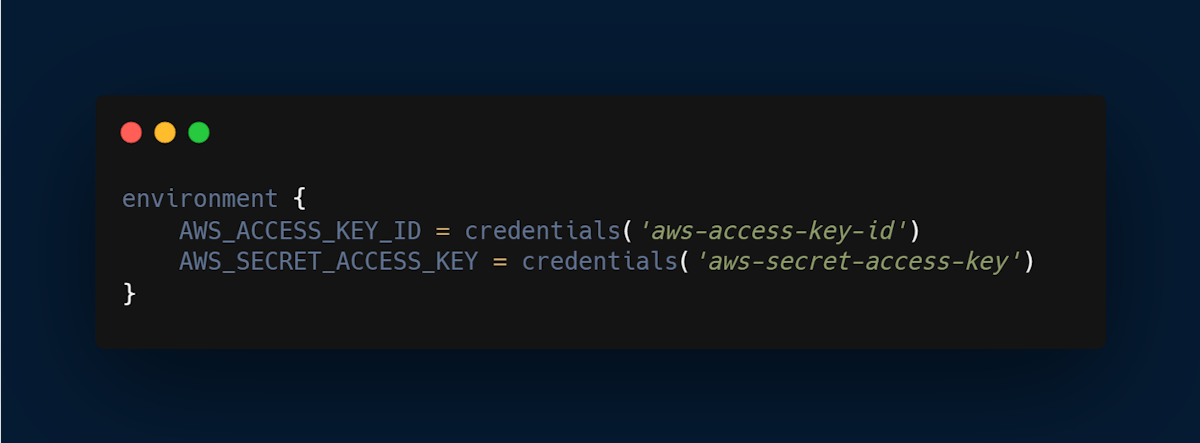
- Add the following code at the beginning of your script:
This code creates environment variables for your AWS access key and secret key, and uses the credentials that you set up in the previous step.
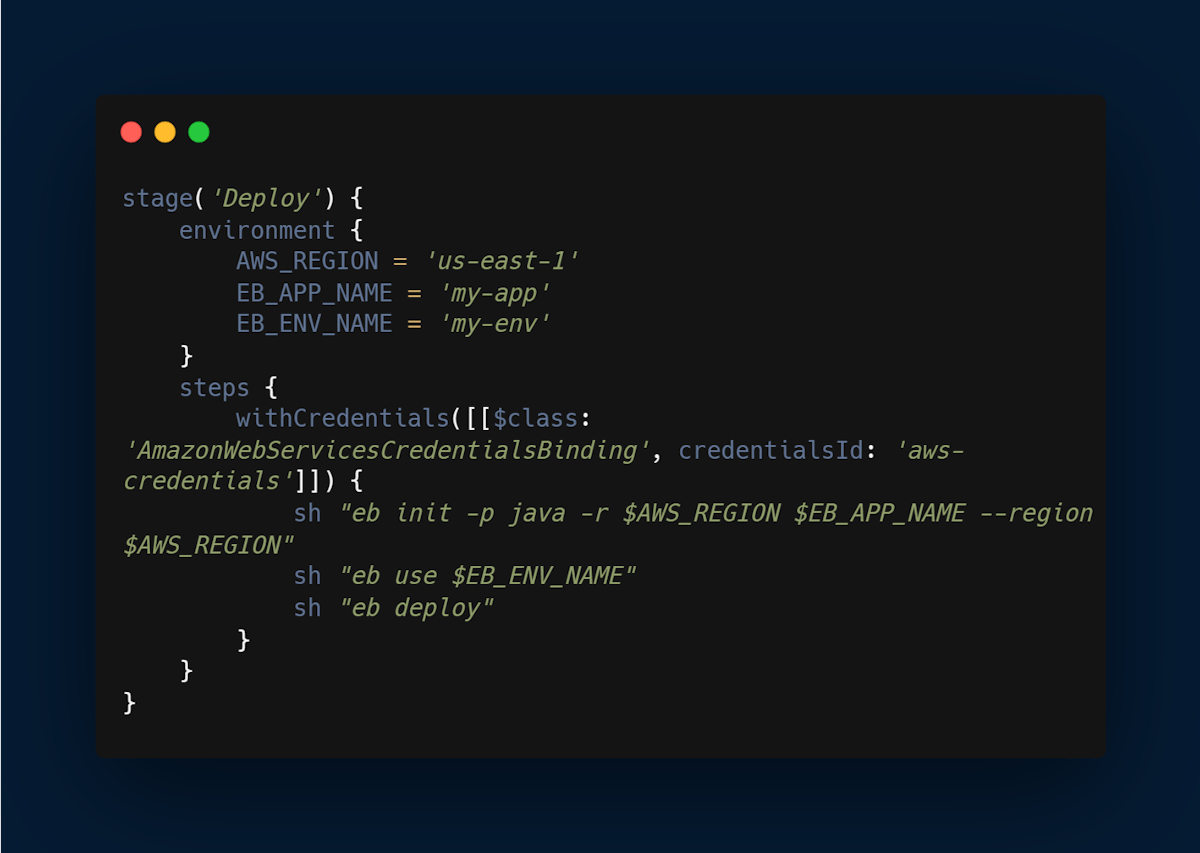
Modify the Deploy stage of your script to use the AWS Elastic Beanstalk CLI. Here's an example script:
This script sets the AWS region, Elastic Beanstalk application name, and Elastic Beanstalk environment name as environment variables. It then uses the withCredentials block to authenticate with AWS using the credentials that you set up earlier. Finally, it runs the eb init, eb use, and eb deploy commands to deploy the application to AWS Elastic Beanstalk.
Click the "Save" button to save your modified Pipeline script.
Looking to seamlessly integrate Jira with Jenkins step by step? Check out our detailed guide on How to Integrate Jira with Jenkins to enhance your development and issue-tracking processes.
Conclusion
In this article, we have discussed how to set up a Jenkins Pipeline on AWS. We covered the installation of Jenkins on an EC2 instance, the configuration of Jenkins, the creation of a Pipeline, if you are having issues with Jenkins taking a long time to build, you can check out our article on how to speed up Jenkins builds here! the set up of AWS credentials in Jenkins, and the modification of the Pipeline script to use AWS credentials. With this setup, you can automate the build, test, and deployment process of your software, making your software development process more efficient and reliable.
To get maximum efficiency out of Jenkins, an engineering analytics tool is the need of the hour. Hatica offers metrics across 13 dashboards, powered by CI/CD tools, Jira, Asana, Jenkins, and GitHub. By collating tool activities at one place, Hatica helps teams streamline their workflow, cut through the clutter of unwanted alerts, and improve productivity. Request a demo with Hatica today!
Subscribe to the Hatica blog today to read more about unblocking developers, and boosting productivity with engineering analytics.