Tools2023-01-24

How to Connect a Github Pull Request to ClickUp Tasks?

Learn how to effortlessly integrate your GitHub account with ClickUp, allowing you to manage your development projects more efficiently.
Connect a Github Pull Request to ClickUp tasks

Are you tired of juggling between multiple tools to manage your workflows? If you are a developer, chances are you have already heard about Github, the popular version control repository platform that allows developers to seamlessly collaborate on code and track changes to their projects. But have you considered integrating it with your cloud-based collaboration and project management tool, for example, like ClickUp By connecting your GitHub account to ClickUp, you can streamline your workflow, keep all your tasks in one place, keep track of all the changes made and boost your productivity.

But don't just take my word for it—the numbers speak for themselves. According to a survey conducted by The Register, 91% of developers reported using GitHub in the past year, a significant increase from the 71% reported the previous year, and ClickUp is quickly becoming the go-to tool for project management, with over 4 million users across its free and paid versions active all around the globe. So why not combine the two and supercharge your workflows?

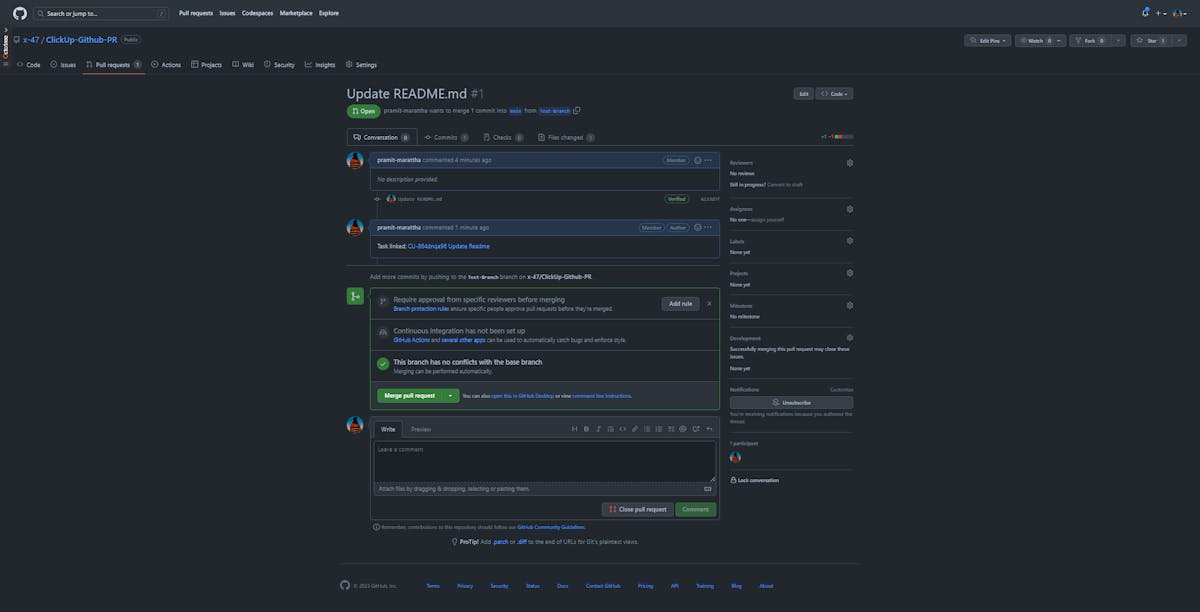
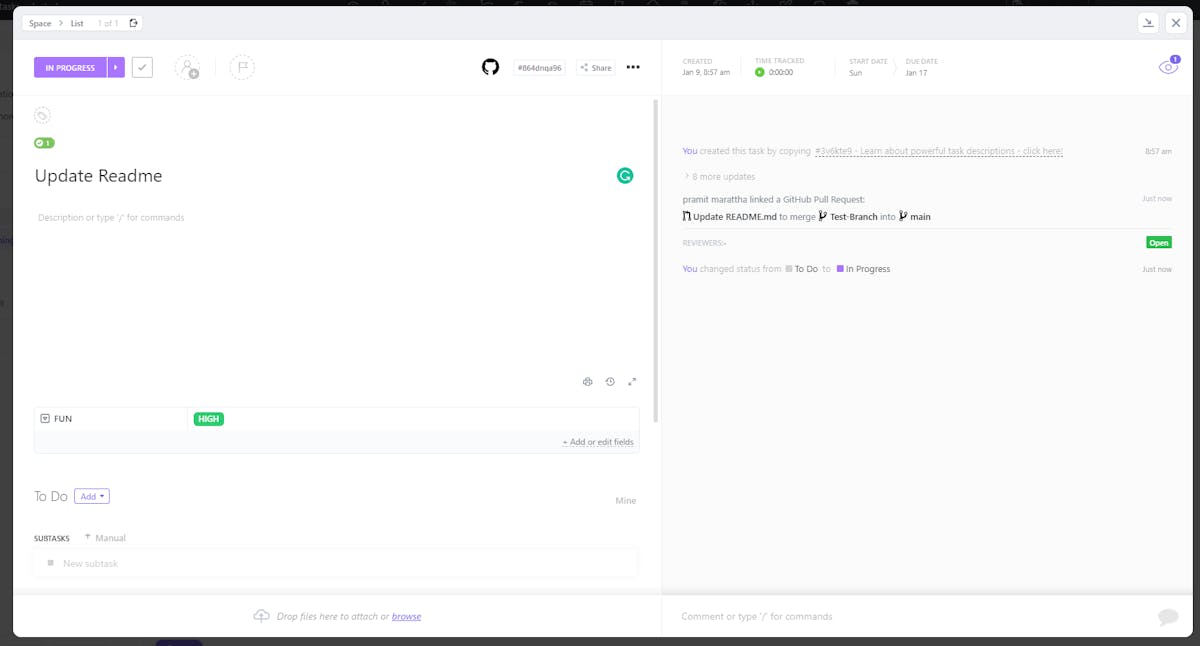
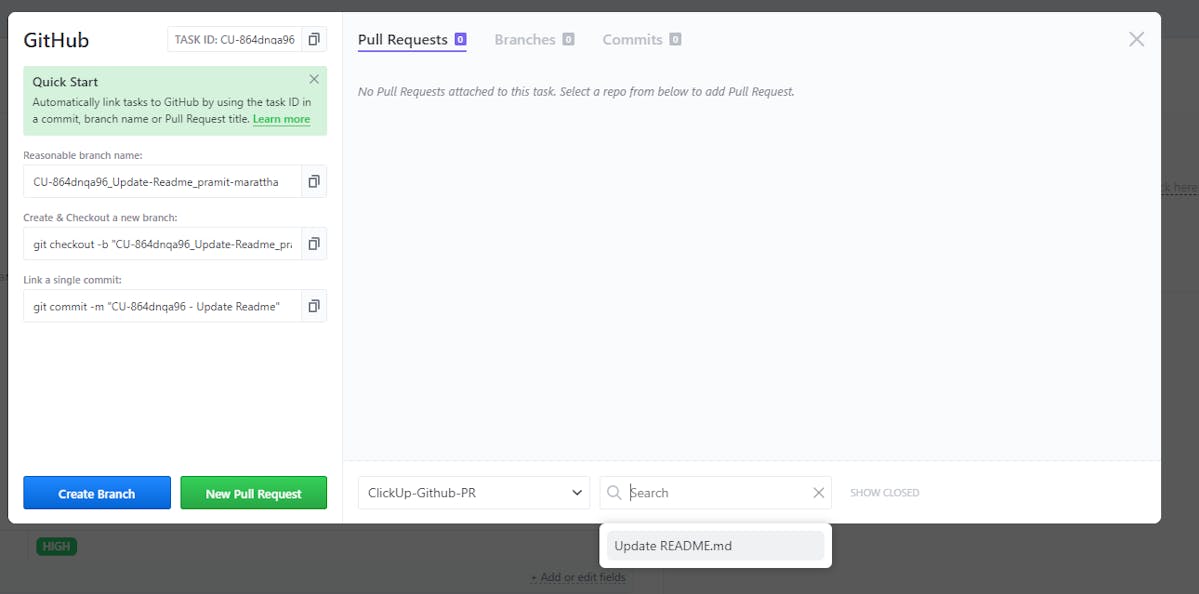
In this article, let's see how to easily connect your GitHub account to ClickUp, track your Github Pull Requests, and make the most of this integration. Let's get started!

Why Connect GitHub Pull Requests to ClickUp Tasks?

Before diving into the "how," let's first understand the "why." The integration between GitHub and ClickUp offers numerous benefits:

1. Centralized Collaboration:

Bringing your code collaboration and task management together in one place streamlines communication and reduces the need to switch between platforms.

2. Enhanced Visibility:

Linking Pull Requests to ClickUp tasks provides clear visibility into the development status of each task or user story.

3. Improved Accountability:

By associating code changes directly with tasks, it's easier to attribute changes to specific requirements, improving accountability within the team.

4. Better Planning:

Project managers can plan sprints or releases more effectively when they can see which tasks have associated Pull Requests.

5. Seamless Workflow:

Developers can initiate code reviews directly from ClickUp tasks, streamlining the development workflow.

How to Connect ClickUp to GitHub?

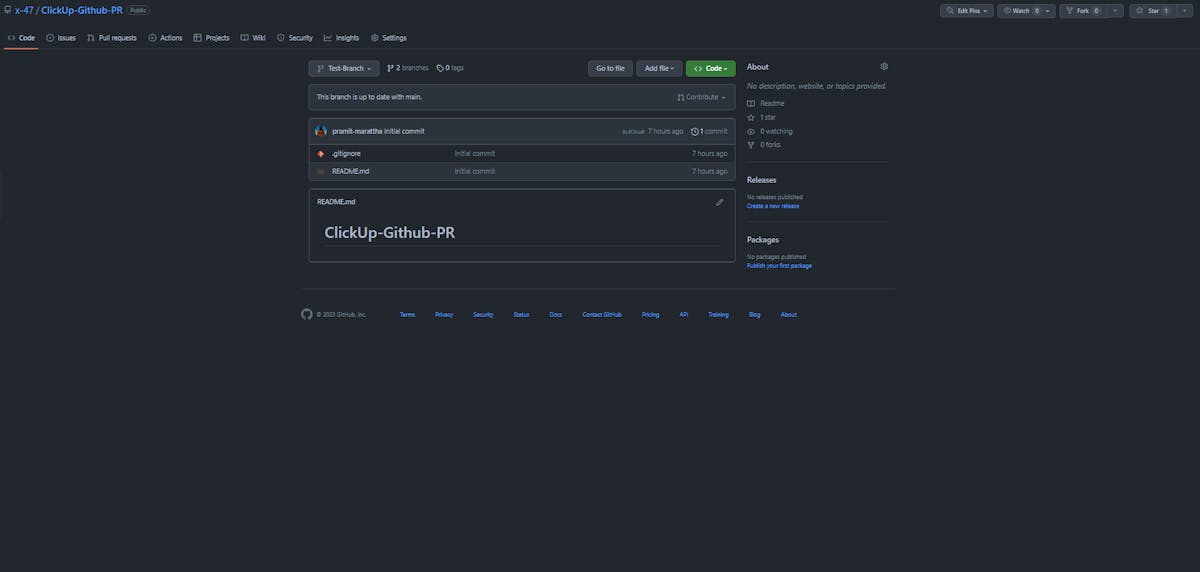
To begin, you'll need to have a ClickUp account and a GitHub account. You'll also need to create a GitHub repository or fork an existing one where you wish to create the pull request, but we'll get to that later; let's finish the configuration first.

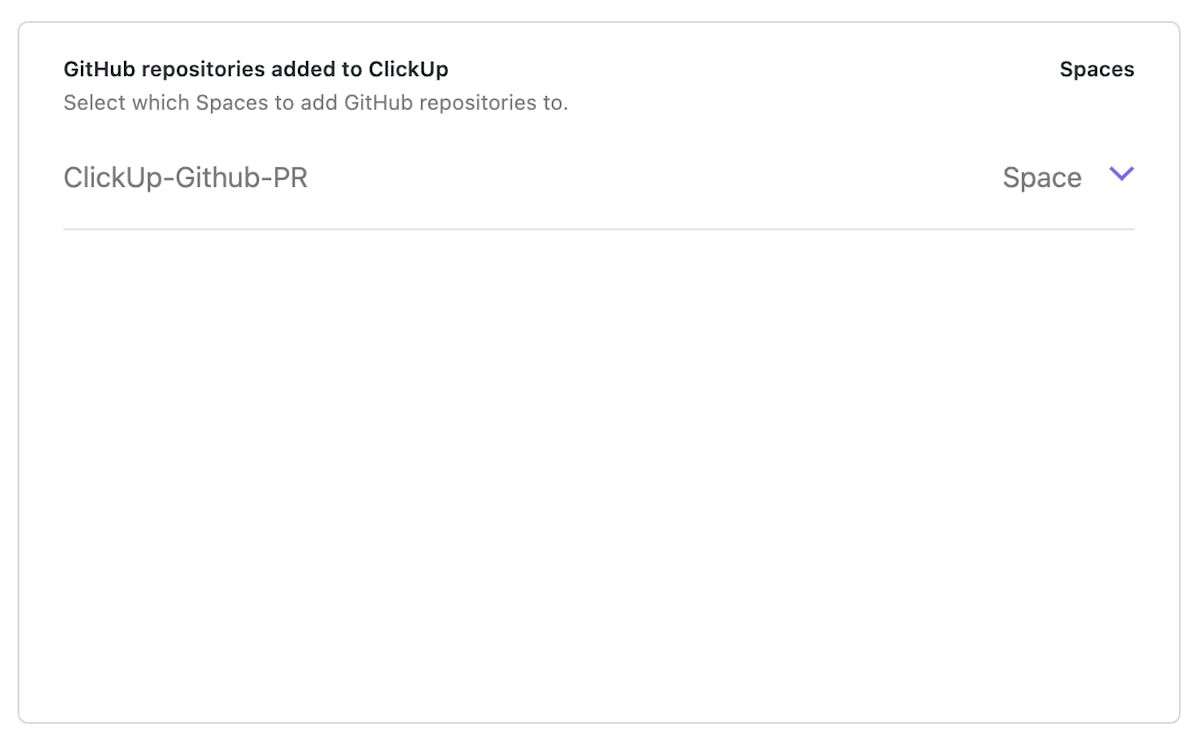
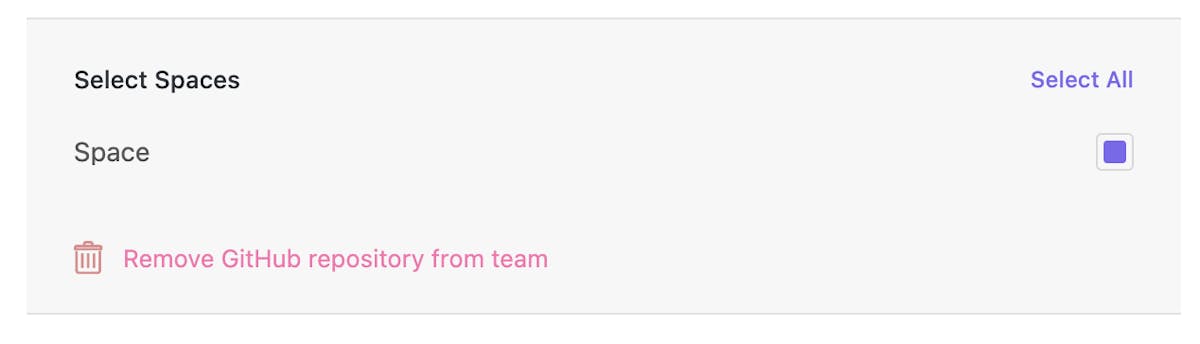
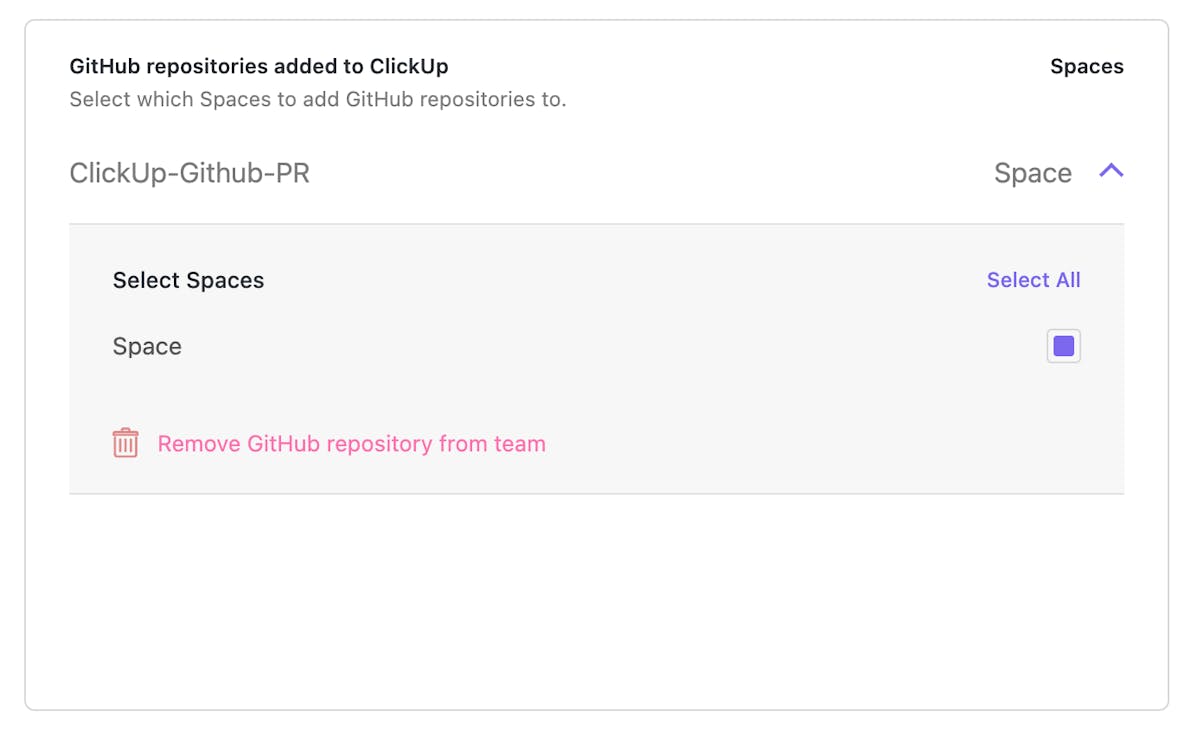
To connect your GitHub account to ClickUp, you'll need to enable the GitHub integration in your ClickUp account. Here's how you can do it:

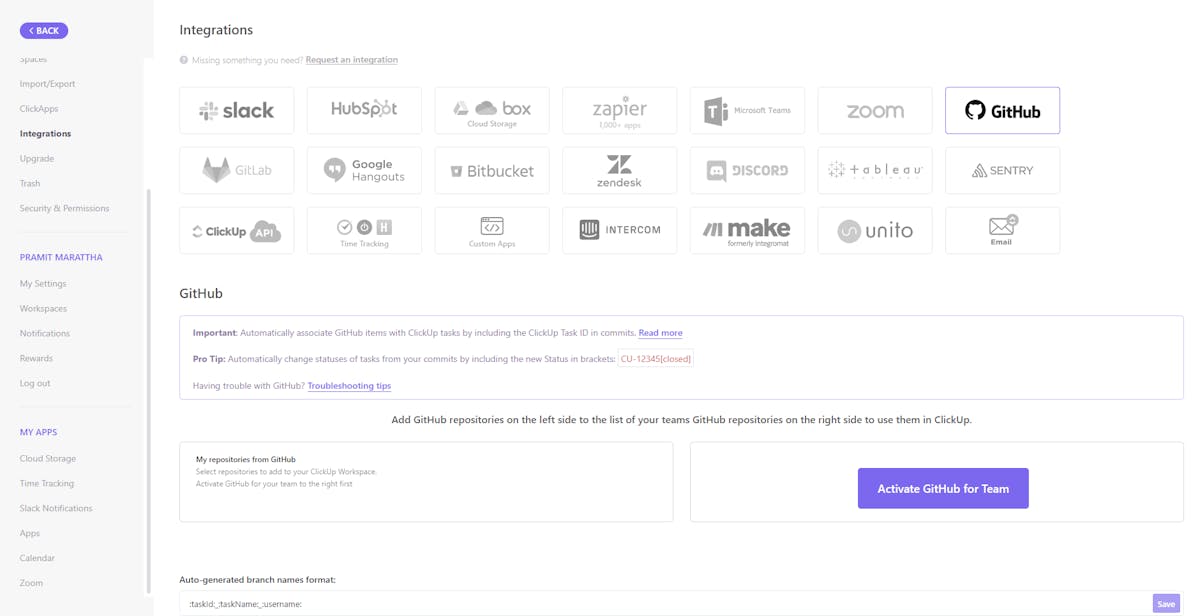
Step 1: Log in to your ClickUp account and click on the "Integrations" tab in the left-hand sidebar.

Step 2: Once you access the integration page, you will see a variety of integrations available. To integrate ClickUp with GitHub, simply click on the GitHub integration option and proceed to click on the "Activate for Team" button located at the bottom right side of the screen.

Github clickup integration

Step 3: Click on the "Add repository" button. This will allow you to add a new repository to your ClickUp, which will enable you to fully access and manage that repository via ClickUp directly.

GitHub repository

Step 4: Once you click on the "Add repository" button, a new pop-up window will open. In this window, you will be prompted to authorize the ClickUp button to access your GitHub account. To proceed, simply click on the "Authorize ClickUp" button and grant permission for the application to access your account.

Authorize clickup to connect with GitHub

Step 5: Congratulations! You have successfully authorized your ClickUp account. The next step is to add ClickUp to your organization's repository or your personal repository. To do this, authorize ClickUp to your organization and click on "Authorize ClickUp," and make sure to enable access for your organization as well.

This will complete the integration process and your organization and your personal repository will now be added to ClickUp. With this, you have successfully integrated your repository with ClickUp.

GitHub and ClickUp

How to Connect GitHub Repositories to ClickUp Spaces?

To connect one or multiple repositories to a specific Space, follow the instructions below:

  • Go to the Integrations page and select the GitHub icon.
Connect GitHub Repositories to ClickUp Spaces
  • From the "GitHub repositories added to ClickUp" section, select the dropdown menu next to the repository you wish to connect.
Integrate GitHub Repositories and ClickUp
  • Select one or multiple Spaces to which you want to add the repository.
select clickup spaces
  • The selected repository is now linked to tasks in the chosen Space(s) and GitHub activities can now be easily tracked and managed from within ClickUp platform.
GitHub repo added to ClickUp
  • Repeat these steps for any other repositories you want to add to Spaces. Note: You can add or remove repositories from Spaces at any given time.

How to Set Your Default Branch Name Format?

If you want to add or provide any special name for branches, you can configure it straight from the Integrations page. Any branches created from ClickUp tasks will adhere to these predefined naming conventions. 

Note: default format is: :taskId:_:taskName:_:username:

To set your default branch name format:

  • Go to the Integrations page and select the GitHub icon.
  • Enter your desired branch name format in the provided field.
Customize your Branch Naming
  • Click on the Save button to apply the changes.

How to Connect Tasks to GitHub?

When you include a valid ClickUp task ID in any part of your pull request title, branch name, or commit message, ClickUp will automatically match new GitHub activity to corresponding tasks.

You will receive a comment on GitHub once the task has been linked, this will be posted using the GitHub account of the owner of the repository if it's a personal repo, and if it's an organization repo it will be posted using the GitHub account of the repository owner who added the repo to the ClickUp Workspace.

How to Create Tasks and Pull Requests?

The first step of the process is to create a task in ClickUp.

Note: To ensure that your GitHub PR corresponds to a specific task, you will need to first create a task within ClickUp to represent the work or task you will be completing. 

Here is a step-by-step guide on how to do this:

Step 1: Go to the project within ClickUp where you would like to create the task.

ClickUp project

Step 2: Click on the "New Task" button located in the top-right corner of the screen.

ClickUp To-do

Step 3: Provide a clear and concise name for the task and add any necessary details or file attachments to provide more clear context.

Step 4: Assign the task to yourself or your team member who will be responsible for completing the task. Congratulations, you have successfully created the task.

To link your GitHub pull request(PR) to ClickUp, follow these steps:

Step 1: Go to GitHub and create a pull request if you haven't already done so.

Link the pull request to the ClickUp task

Step 2: In this demo example, we will be updating the readme file. As you can see in the screenshot, the readme has been updated and a pull request (PR) has been created.

Clickup readme files

Step 3: Go back to your ClickUp task and open it. You should see a Github icon at the top of the task. Click on it.

Clickup update readme

Step 4: A popup will appear. In the popup, select the repository. Select the pull request you want to attach to this task.

GitHub PRs

Step 5: Once you have attached the GitHub pull request(PR) to the task, go back to your pull request page on Github. You should see a comment generated with the task id, task name, and date. If you see this, it means you have successfully linked your Github pull request with ClickUp. Cheeers!

GitHub and clickup readme

Maximize Efficiency with GitHub-ClickUp Integration

Integrating GitHub pull requests with ClickUp tasks has the potential to completely transform your team's work routine and collaboration. These two platforms serve different functions, but by utilizing them both together, you can easily track code changes, streamline the review process, and manage projects more efficiently, ensuring that work is properly tracked and organized. On top of it, GitHub when connected with Jira can also offer seamless project management. We hope this article has provided a helpful guide on how to connect GitHub pull requests to ClickUp tasks and that you'll start using this integration to improve your team's productivity.

However, simply integrating two tools sometimes might not be enough to get the best out of your workplace tools, an engineering analytics tool can equip you with the data-driven insights you need to place your team on top. Hatica offers metrics across 13 dashboards, powered by CI/CD tools, Jira and GitHub. By collating tool activities at one place, Hatica helps teams streamline their workflow and improve productivity. Request a demo with Hatica today!

FAQs

1. Can I connect multiple GitHub repositories to ClickUp?

Yes, you can connect multiple GitHub repositories to ClickUp. This flexibility allows you to manage tasks and projects across different repositories, making it convenient for teams working on various projects simultaneously.

2. How does ClickUp-GitHub integration improve project management?

ClickUp-GitHub integration enhances project management by:

  • Providing a centralized platform for tracking tasks, code changes, and development progress.
  • Linking GitHub Pull Requests to ClickUp tasks for clear task-to-code association.
  • Enabling real-time updates on task status based on GitHub activities.
  • Simplifying communication and collaboration between developers and project managers.

3. Can I customize workflows for different GitHub repositories within ClickUp?

ClickUp-GitHub integration allows you to customize workflows for different GitHub repositories. You can set up unique task statuses and workflows based on the specific needs of each project, ensuring adaptability and efficiency.

4. How does this integration enhance visibility into development progress?

ClickUp-GitHub integration enhances visibility by linking GitHub activities to ClickUp tasks. It provides real-time updates on code changes, Pull Request status and task progress. This ensures that project managers and team members have a clear understanding of the development process at all times.

5. Can I connect ClickUp-GitHub integration to my organization's GitHub repository?

You can connect ClickUp-GitHub integration to your organization's GitHub repository. Authorizing ClickUp for your organization enables access to the repository, allowing for comprehensive task and code management.

Subscribe to Hatica's blog

Get bi-weekly insights straight to your inbox

Share this article:
Table of Contents
  • Why Connect GitHub Pull Requests to ClickUp Tasks?
  • 1. Centralized Collaboration:
  • 2. Enhanced Visibility:
  • 3. Improved Accountability:
  • 4. Better Planning:
  • 5. Seamless Workflow:
  • How to Connect ClickUp to GitHub?
  • How to Connect GitHub Repositories to ClickUp Spaces?
  • How to Set Your Default Branch Name Format?
  • How to Connect Tasks to GitHub?
  • How to Create Tasks and Pull Requests?
  • How to Link Pull Request to ClickUp Task?
  • Maximize Efficiency with GitHub-ClickUp Integration
  • FAQs
  • 1. Can I connect multiple GitHub repositories to ClickUp?
  • 2. How does ClickUp-GitHub integration improve project management?
  • 3. Can I customize workflows for different GitHub repositories within ClickUp?
  • 4. How does this integration enhance visibility into development progress?
  • 5. Can I connect ClickUp-GitHub integration to my organization's GitHub repository?

Ready to dive in? Start your free trial today

Overview dashboard from Hatica