Manage Check-ins
Hatica Check-ins help you automate your team syncs and workflows, such as daily stand-ups, sprint retrospectives, pulse checks, and more. This can help you improve team communication, collaboration, and productivity.
Managing check-ins is super simple with Hatica. Here is everything you need to know about creating, updating, pausing, or deleting a check-in:
Create a Check-in
Prerequisites
- Before creating a Check-in for your team, configure the Slack channel.
- Only users with the Admin role can create and manage check-ins.
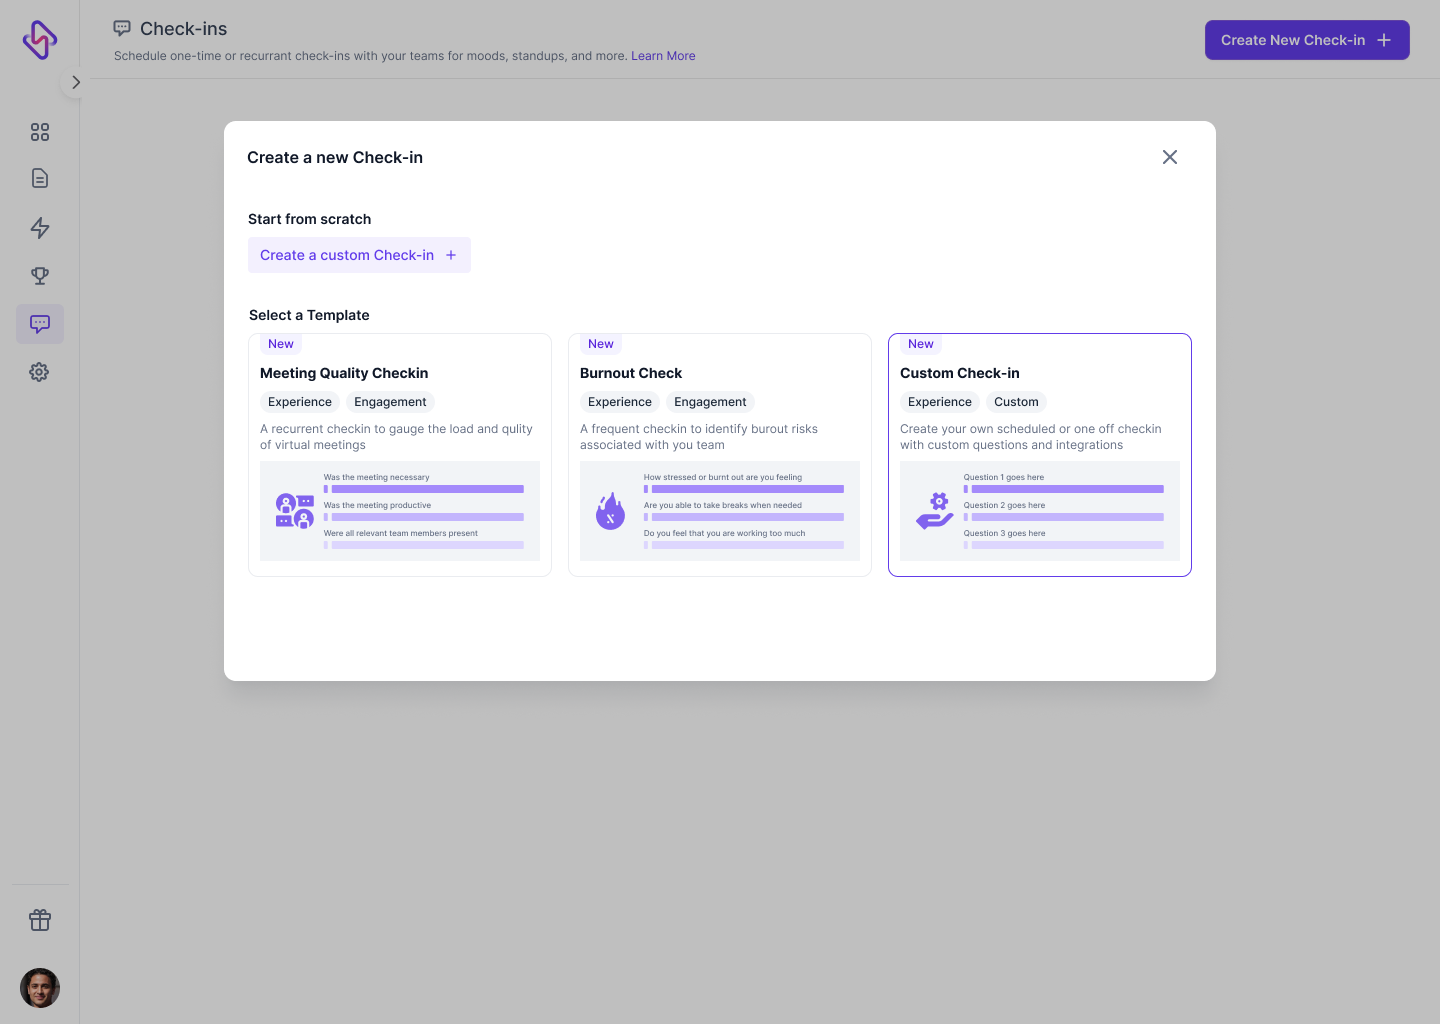
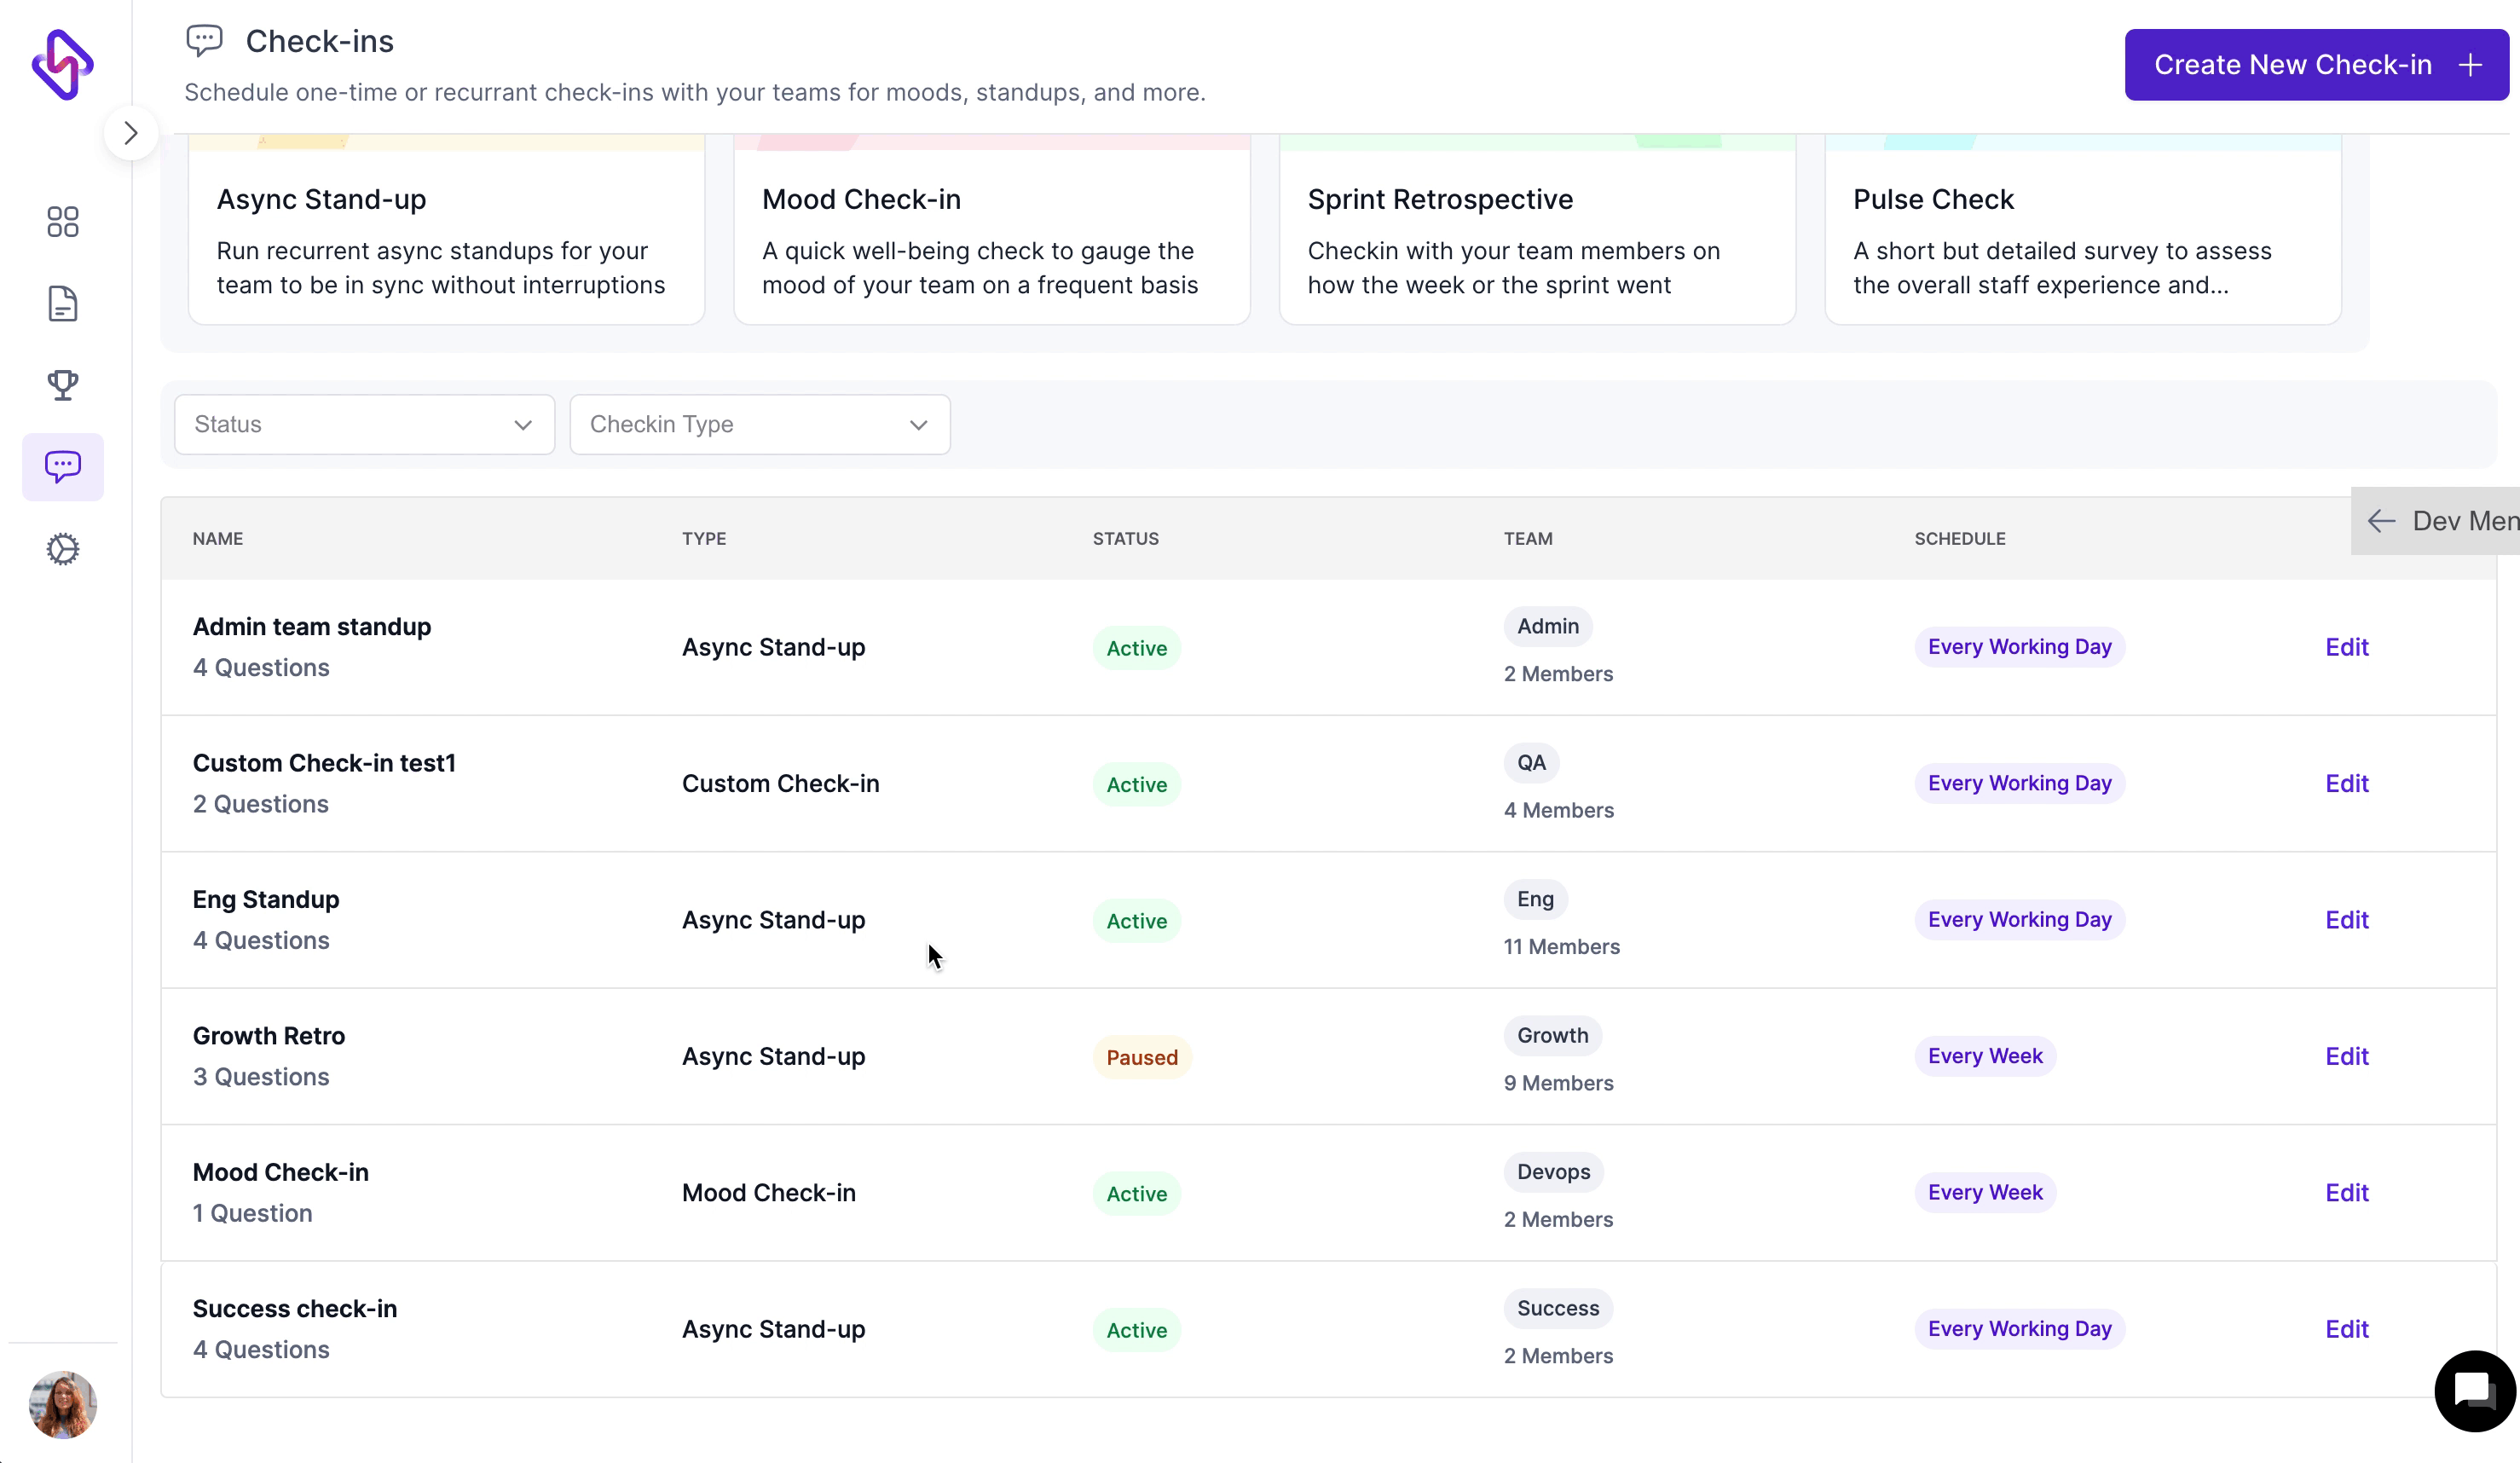
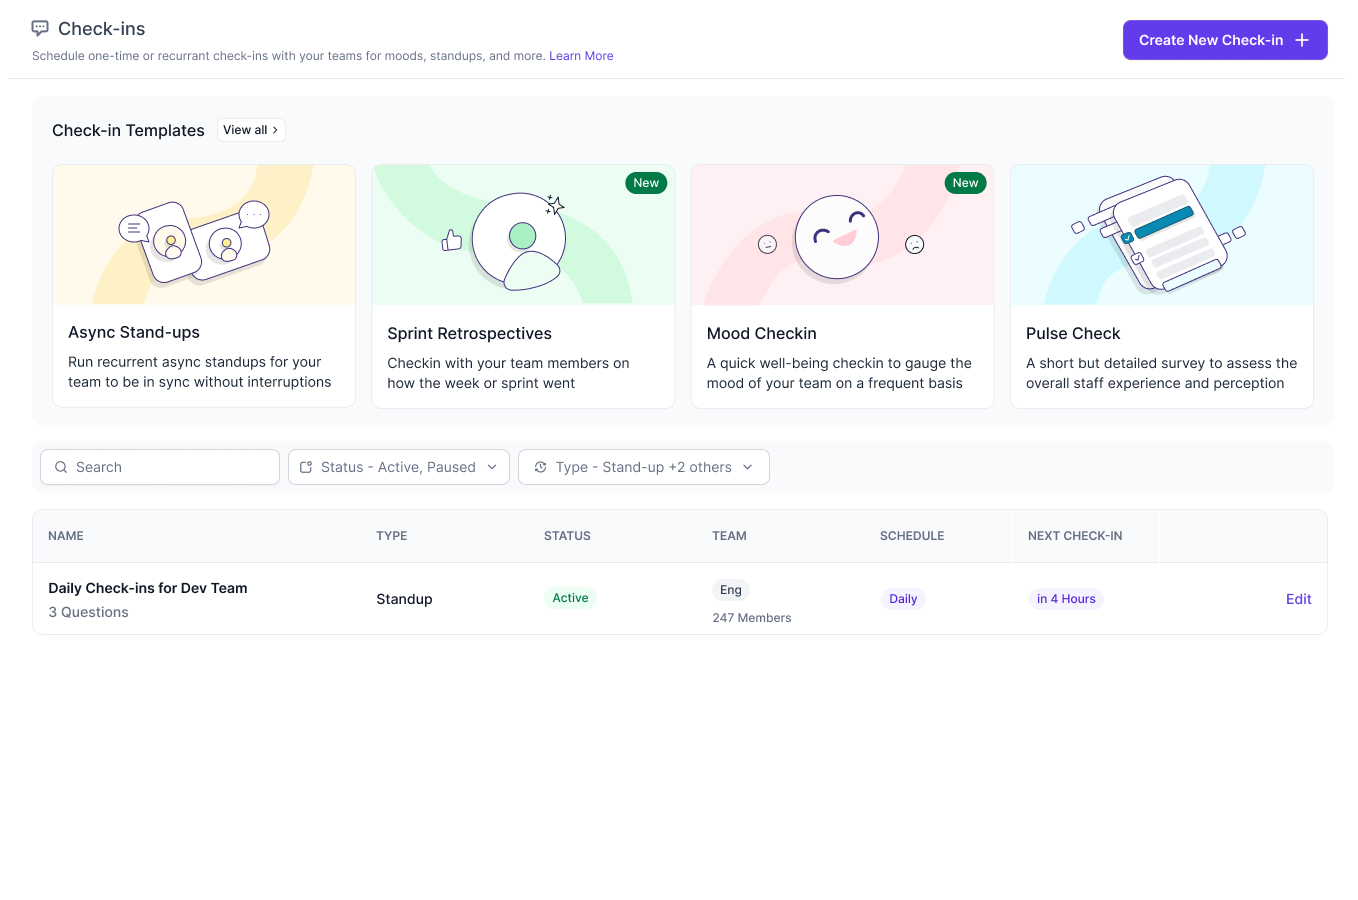
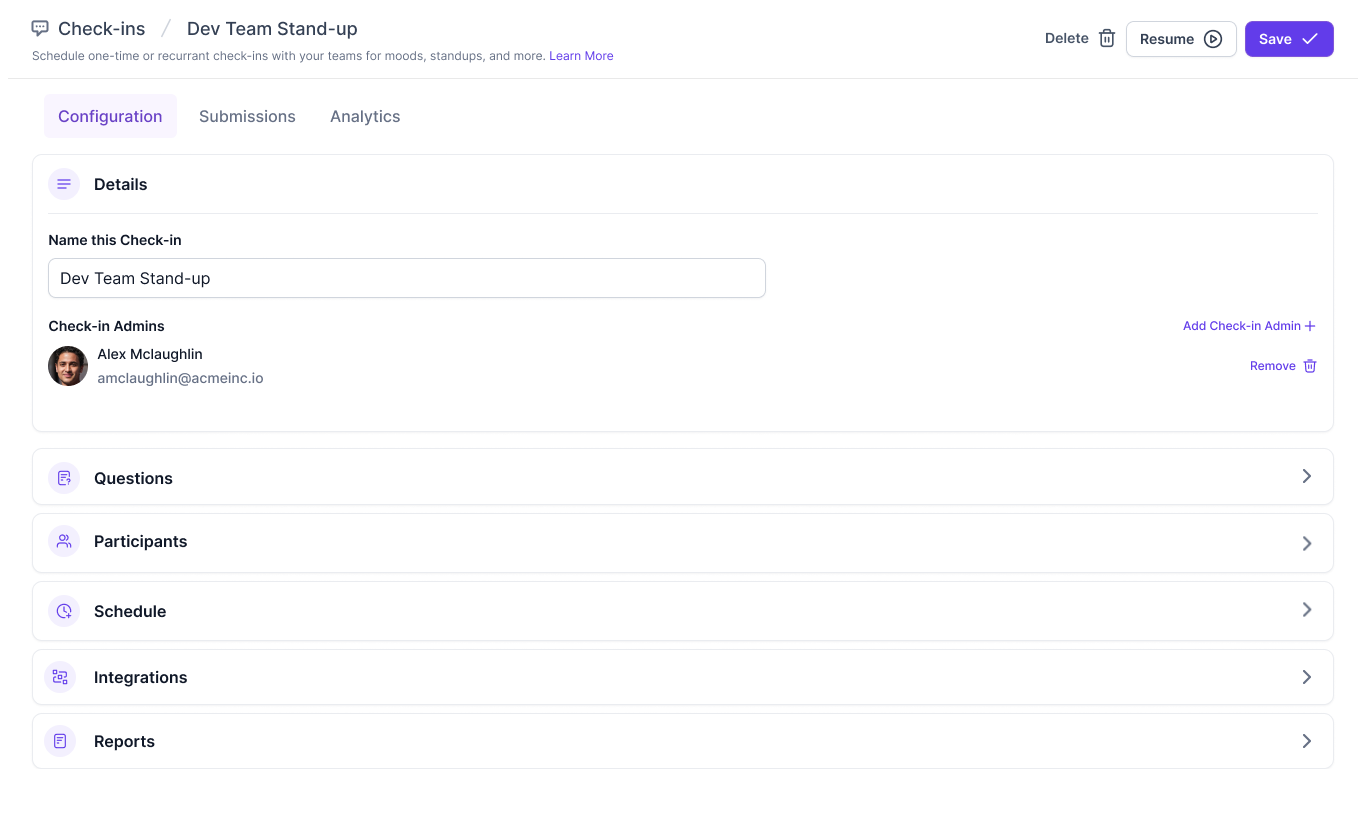
- Go to the Check-ins tab (https://app.hatica.io/checkins (opens in a new tab)) and click the Create New Check-in button or select a template from the dashboard.
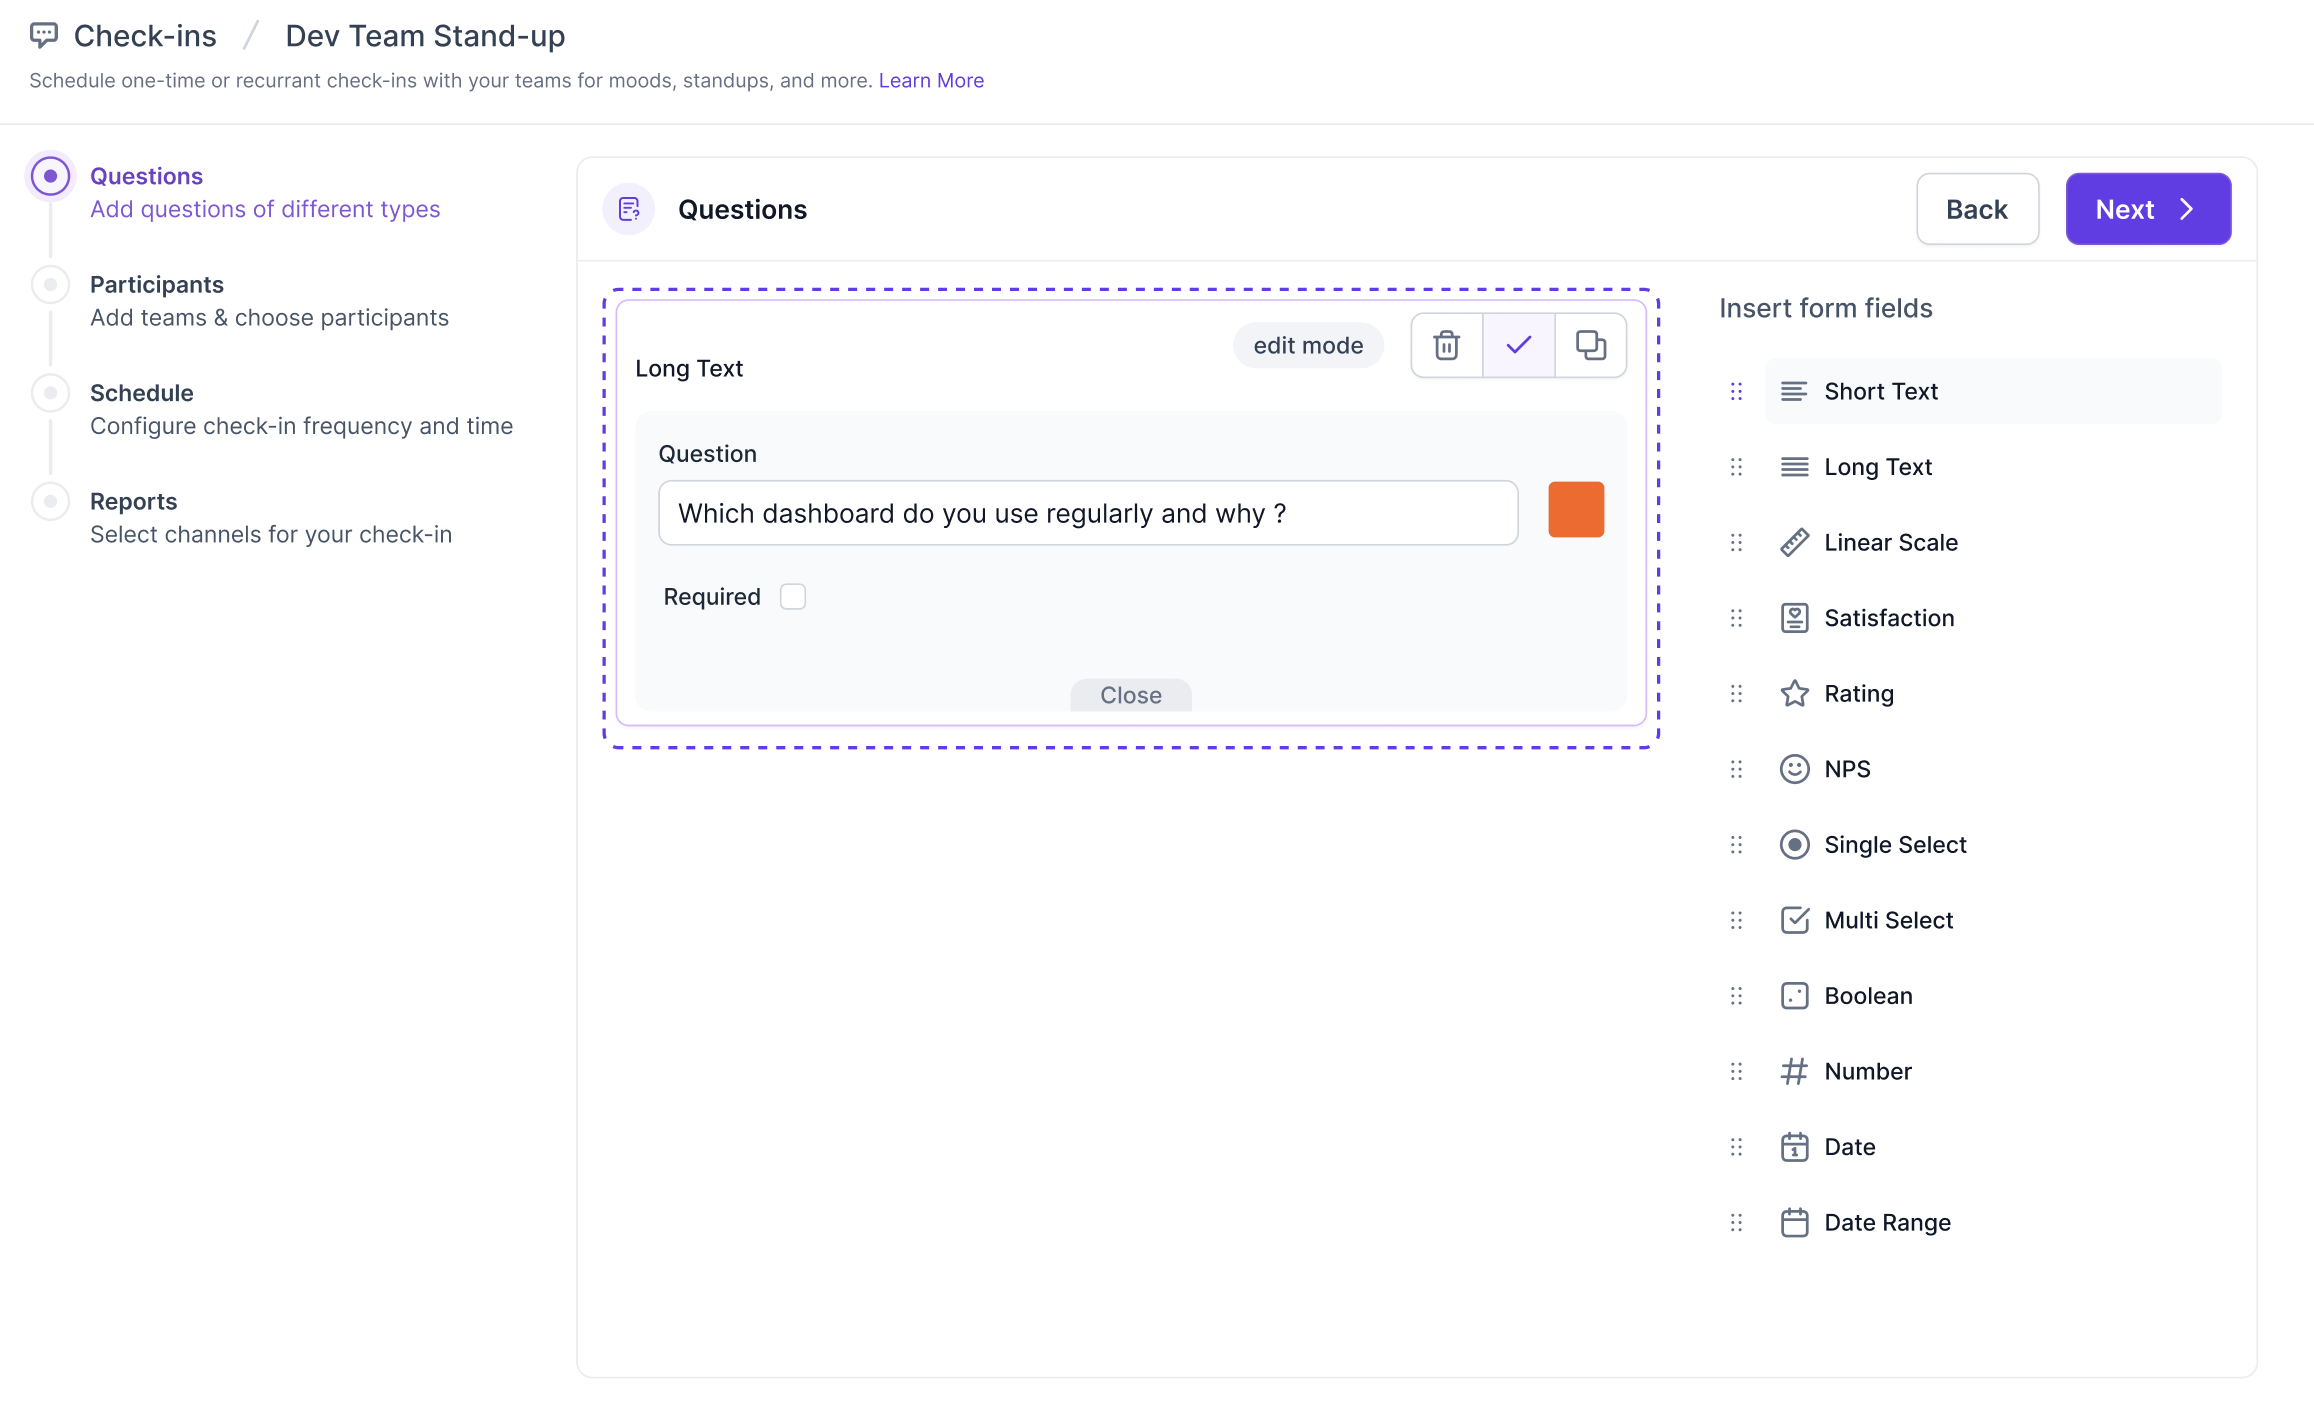
- Drag and drop a question type (opens in a new tab) of your preference and add the question title. For a multiple choice question, add the possible responses. You can make questions mandatory by enabling the "Required" option.
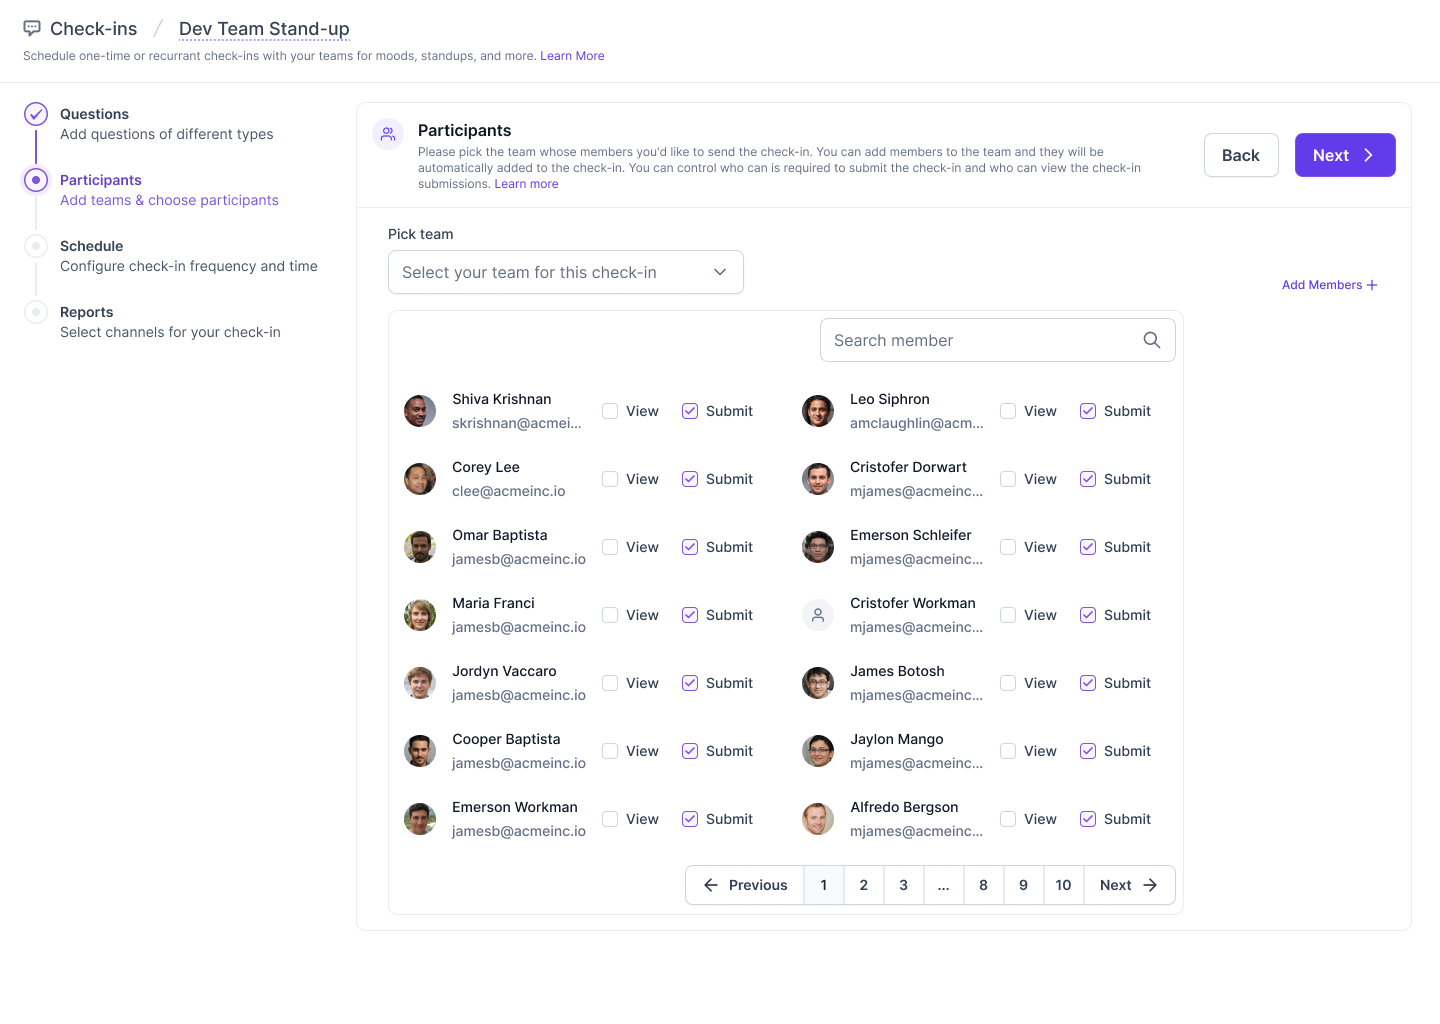
- Select the team for which you want to create the check-in. Click "Add Members" to include additional participants. By default, all team members can submit the check-in form. However, you can specify which members can view the check-in data on the dashboard. There are two types of check-in participants:
- Viewers: Viewers can access check-in data on the Hatica dashboards.
- Submitters: Submitters can submit responses to check-ins.
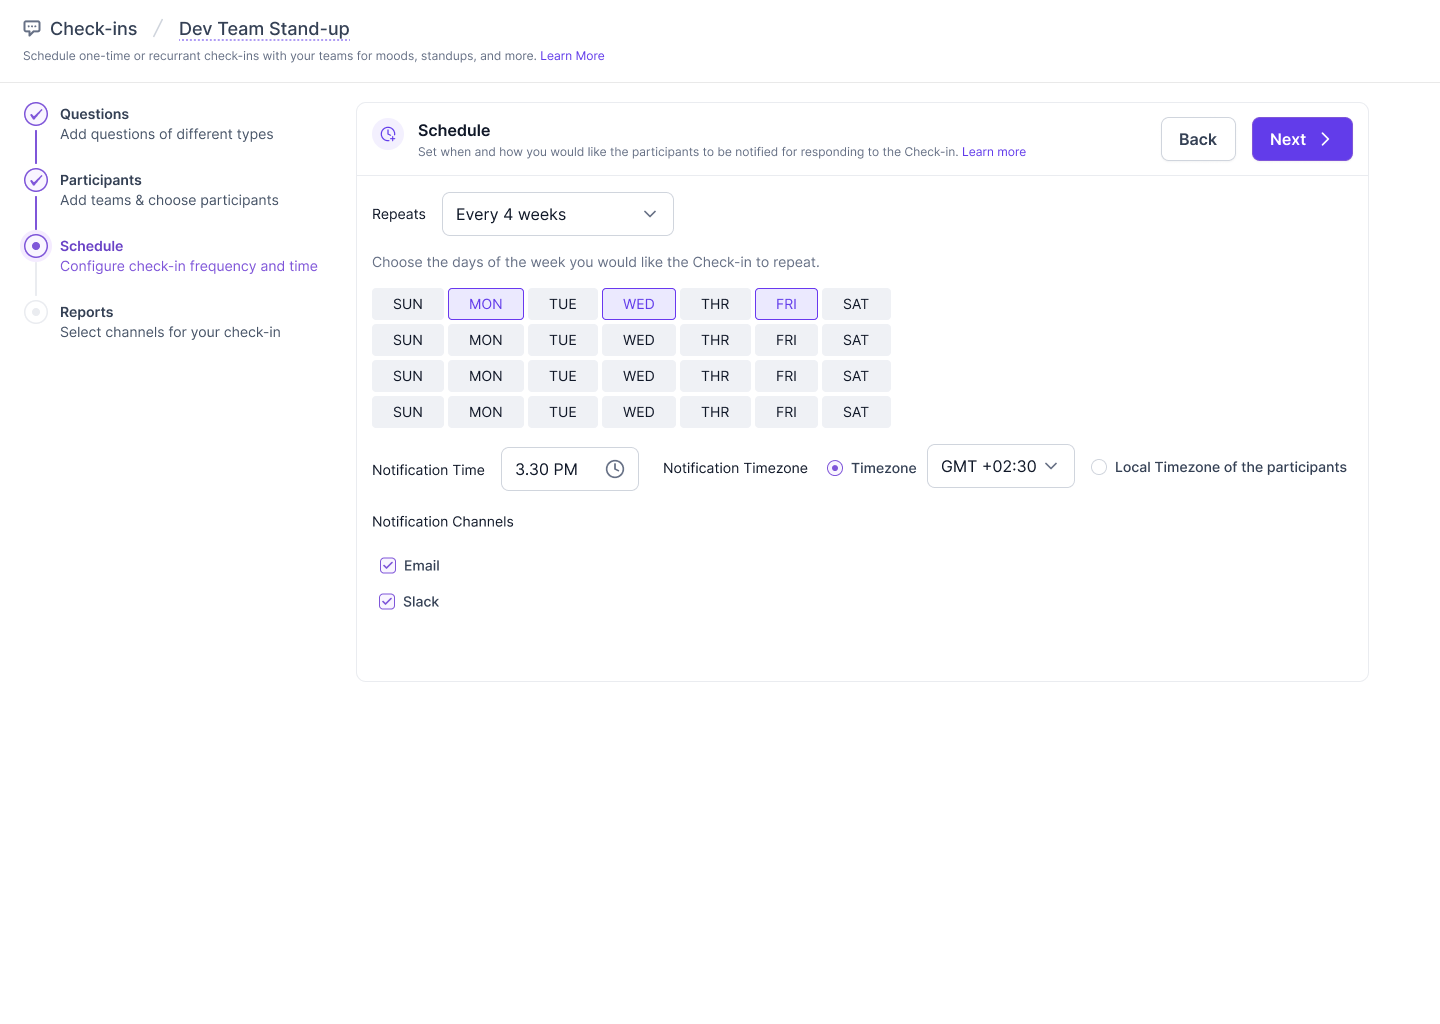
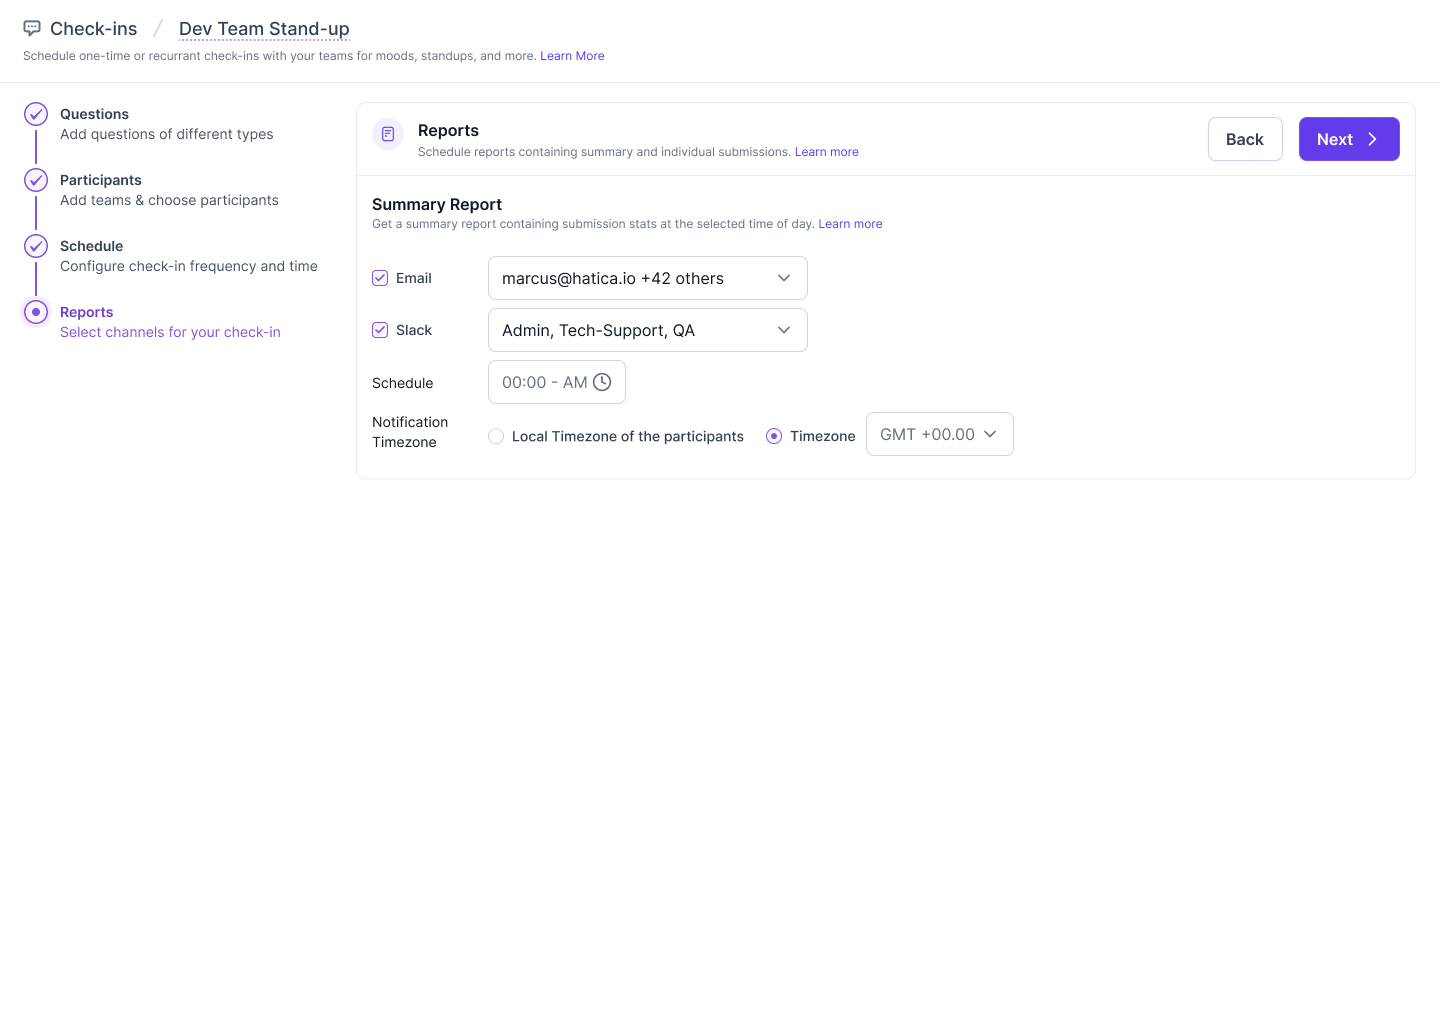
- Pick the schedule for the check-in. You can specify the days of the week, repetition, notification time, and manage timezones.
- Select the Slack channel where you want to share the check-in summary report, which will contain submission stats at your chosen time of day.
- Click Publish to create the check-in.
Invite Hatica to Private Channels for Check-in Reports
If you previously used a private channel for check-in reports in Dixi, you'll need to invite Hatica to that channel for reports to continue in Hatica.
- Go to your private Slack channel
- Type /invite @hatica in the message bar and press Enter.
- You'll see a confirmation message once Hatica joins.
- Go back to the check-in details page on Hatica's dashboard to set the channel
- If the you don't find the channel in the drop down after inviting Hatica, try a hard refresh.
Remember to save your changes by hitting the Save button.
Update a Check-in
You can manage and update the configurations of the check-ins you are an admin of, including managing participants, adding new team members or admins, updating questions, schedules, and more.
- Go to the Check-ins tab (https://app.hatica.io/checkins (opens in a new tab)) in your Hatica Dashboard and find the check-in you want to update. You can filter the list by check-in type or status to simplify your search. Click on the Edit button.
- Once you have made your desired changes, click the Save button to apply them.
Delete a Check-in
Deleting a check-in is a permanent action. Once taken, all the data related to the check-in is deleted and can not be restored. To be on the safer side, you can choose to pause a check-in instead of deleting it. In this way you will still have your check-ins data in your Hatica dashboard. To Delete a Check-in, go to the update screen and click on the Delete button.
Pause a Check-in
Pausing a check-in in Hatica temporarily disables it. When a check-in is paused, participants won't receive notifications or be able to submit responses. It's useful when you want to halt a check-in temporarily, perhaps during holidays or special events, without permanently deleting it. To Pause a Check-in, go to the update screen and click on the Pause button.